Understanding the Nitrogen Cycle in Your Turtle Tank: A Beginner’s Guide
Published on: December 17, 2025 | Last Updated: December 17, 2025
Written By: Matthew The
If you’re staring at murky turtle tank water and wondering why your diligent cleaning isn’t working, you’re likely facing the invisible challenge of the nitrogen cycle. It’s the unseen foundation of a healthy habitat, more critical than any filter.
This guide walks you through the cycle’s basics, how to test your water safely, and gentle ways to speed up the process, transforming your tank into a clear, thriving ecosystem.
The Basics: What Exactly Is the Nitrogen Cycle?
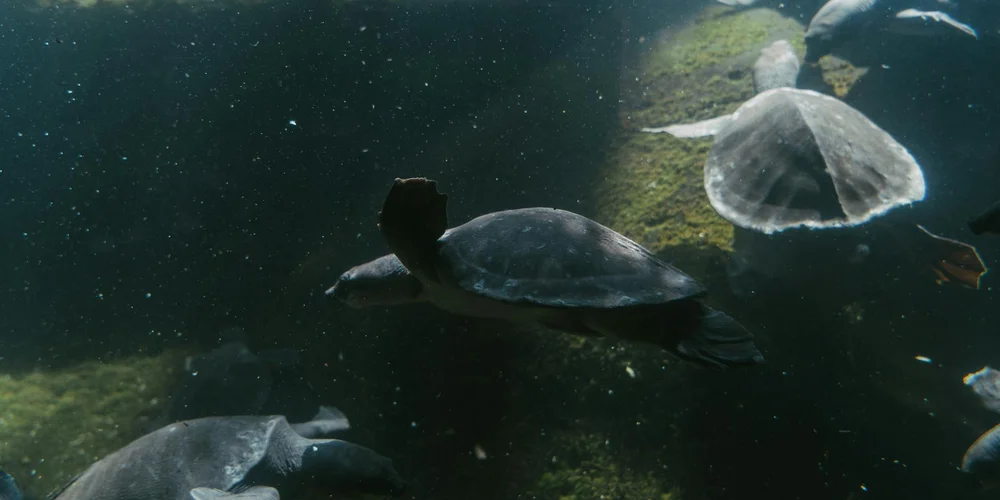
Picture your turtle tank as a tiny, watery world. The nitrogen cycle is the invisible, natural cleanup crew that lives there. It transforms turtle waste and leftover food from toxic trash into safer substances.
I learned this the gentle way with Austen, my Russian tortoise. His peaceful digs needed a system to handle his steady contributions. This cycle isn’t just chemistry; it’s the foundation of a living, breathing aquatic home.
The Three Key Players in Your Tank
Think of the process in three clear stages. Helpful bacteria are the stars of the show.
- Ammonia Arrives: Waste and decay produce ammonia. This is highly irritating and dangerous in even small amounts.
- First Transformation: One group of bacteria converts ammonia into nitrite. Nitrite is still quite toxic to your shelled friend.
- Final Conversion: A second group of bacteria then changes nitrite into nitrate. Nitrate is much less harmful and is managed through regular water changes.
Establishing these bacterial colonies is what “cycling” your tank truly means. Without them, toxins build up fast. My graceful Greek tortoise, Bronte, taught me patience during this setup phase. Rushing it helps no one.
Why Your Turtle’s Health Depends on a Balanced Cycle
An unbalanced cycle doesn’t just make water cloudy. It directly attacks your turtle’s well-being. I advocate for their welfare because I’ve seen the subtle signs of distress.
Consistent water quality from a balanced cycle prevents a cascade of health issues. Imagine breathing in fumes all day. That’s life in a toxic tank for your pet.
Direct Risks of an Unmanaged Cycle
- Shell and Skin Problems: Ammonia and nitrite can cause painful shell rot, skin ulcers, and irritated eyes.
- Respiratory Stress: Turtles absorb water through their cloaca. Bad water quality stresses their entire system, making them prone to illness.
- Lethargy and Loss of Appetite: A turtle feeling the burn of toxins will often stop eating and become inactive. My reserved box turtle, Orwell, hides completely when his water is off.
Your vigilance with this cycle is the most powerful preventative care you can offer. It’s a quiet promise of safety you make to your animal companion.
The Calm of a Cycled Tank
When the cycle hums along perfectly, everything changes. Your turtles display natural, vibrant behaviors.
- They bask with contentment.
- They eat with hearty enthusiasm.
- Their swimming becomes lively and curious.
Seeing Austen methodically patrol his clean domain brings me real peace. A balanced nitrogen cycle is the silent guardian that lets your turtle simply be a turtle. It’s not extra work; it’s the core of compassionate, informed care.
From Turtle to Tank: Understanding Nitrogenous Waste
Think of your turtle’s body as a tiny, beautifully complex food processing plant. It takes in fuel and building materials—their food—and what’s left over must go somewhere. That “somewhere” is your tank water, and understanding what these leftovers are is the first step to mastering tank health. It’s not just poop; it’s a whole biochemical story that starts inside your pet. Understanding turtle digestion and its waste helps explain why turtles pee and poop the way they do. Those waste patterns are key clues to digestion health and tank balance.
Waste Products: Ammonia, Urea, and Uric Acid
Your turtle produces three main types of nitrogenous waste, and each one behaves differently in your tank’s ecosystem.
- Ammonia (NH₃): This is the big one. It’s highly toxic, even in small amounts. Ammonia primarily comes from their urine and the immediate breakdown of waste in the water. If you’ve ever noticed a sharp, unpleasant smell from a dirty tank, that’s ammonia talking. In a new tank, ammonia spikes are the most common danger for your turtle.
- Urea: Many animals, including some turtles, excrete urea, which then quickly converts to ammonia in water. This conversion is why testing for ammonia covers this base.
- Uric Acid (Urates): This is the white, pasty part you often see attached to your turtle’s solid waste. Reptiles like my Russian tortoise, Austen, produce this as a way to conserve water. It’s less soluble and less immediately toxic than ammonia, but it will break down over time, adding to the nitrogen load. Spotting those white urates is completely normal and a sign of their efficient water-saving biology.
The Role of the Kidneys and Cloaca
This is where the internal magic happens. Your turtle’s kidneys are the master filters, sorting waste from useful nutrients in the bloodstream. They produce urine. But here’s the unique reptilian twist: instead of a separate bladder and rectum, turtles have a multi-purpose chamber called a cloaca. In basic turtle anatomy, the kidneys and cloaca form a compact waste-and-water system. Together with other organs, they support the turtle’s life on land and in water.
The cloaca is the final exit for everything-urine, urates, and feces. This is also where water can be reabsorbed back into the body from waste, which is crucial for species that spend less time fully submerged. Watching my box turtle, Orwell, you can see how his system is finely tuned for a more terrestrial life, producing drier, urate-heavy waste. This single exit point means all waste types mix upon release, creating the combined challenge your filter must handle.
Protein in Diet and Waste Output
What goes in directly determines what comes out. Protein is a key player here. Proteins are made of amino acids, which contain nitrogen. When broken down for energy or repair, that nitrogen must be excreted.
- High-Protein Diets (for young or certain species): A growing turtle or a more carnivorous species will process more protein, leading to a higher output of nitrogenous waste. More ammonia potential.
- Balanced Adult Diets: An adult turtle like my Greek tortoise, Bronte, on a primarily leafy, fibrous diet will generally produce less concentrated nitrogen waste. The waste is more bulky with fiber, but the nitrogen load from protein metabolism is lower.
I learned this the hard way early on. Overfeeding high-protein turtle pellets led to cloudy, smelly water alarmingly fast. Managing portion size and diet balance is not just about turtle obesity; it’s your first and most effective line of defense against waste overload. Knowing when your turtle is overweight can help prevent these issues. A cleaner diet means a cleaner tank and a happier, healthier turtle swimming in it.
Your Step-by-Step Guide to Cycling a New Turtle Tank
Think of this guide as your friendly map through a misty, important journey for your shelled friend’s home. Getting the nitrogen cycle right isn’t just a task; it’s the single most caring gift you give your turtle before they even swim in. I learned this the patient way, through trial and gentle error with my own crew-Austen, Bronte, and Orwell.
Gathering Your Supplies: Tank, Filter, and Test Kit
Your first step feels like packing for a careful expedition. Choosing the right equipment from the start prevents a world of stress for you and your turtle later on. I still remember setting up Orwell’s first proper tank; the clarity of planning made all the difference. Thinking ahead also means budgeting for turtle setup costs and building a complete shopping list for your first tank. With the right gear in hand, your first tank can be a smooth, stress-free transition.
You will need a few key items:
- A tank that is much larger than you think. For most aquatic turtles, start with at least 10 gallons of water per inch of shell length. My Russian tortoise Austen lives in a terrarium, but for aquatic species, space is non-negotiable for health.
- A filter rated for two to three times the volume of your tank. Turtles are messier than fish. A robust filter is your main ally in maintaining water quality and animal welfare.
- A liquid-based master test kit for freshwater. Test strips are tempting, but the liquid kits are far more reliable. You’ll be testing for ammonia, nitrite, and nitrate almost daily during this process.
- A water conditioner that removes chlorine and chloramines. Tap water will kill the beneficial bacteria you’re trying to cultivate.
- A source of ammonia. This can be a pinch of turtle food, a piece of raw shrimp from the grocery store, or a dedicated liquid ammonia product without surfactants.
Gathering these tools feels practical, but it’s a deeply ethical act. Providing a cycled tank is the foundation of preventing respiratory infections and shell rot in your turtle.
The Cycling Process: Watching for Ammonia and Nitrite Spikes
Now, the quiet magic begins. Cycling is the process of growing invisible, beneficial bacteria that will eat your turtle’s waste. You are essentially building a tiny, living water treatment plant inside your filter. The process has distinct phases you’ll watch unfold through your test kit.
- Start the Ammonia Source: Set up your tank with filter and conditioned water. Add your ammonia source-I often use a single pellet of my turtles’ food. This begins producing ammonia, which is toxic and the first food for bacteria.
- The Ammonia Spike: Over several days, test your water. You will see the ammonia level rise and peak. This is normal and expected. Your tank water might even develop a faint, organic smell. This rise is a sign that the cycle has begun, not that you’ve failed.
- The Nitrite Appears: After a week or two, as ammonia starts to drop, you’ll see nitrite levels spike on your test kit. Nitrite is also highly toxic to turtles. This means a second type of bacteria is now growing, converting ammonia into nitrite.
- The Long Wait for Nitrate: The nitrite spike can last the longest. Be patient. You are waiting for a third bacterial colony to establish itself and convert nitrite into nitrate, which is far less harmful. This stage taught me more about patience than any other part of pet care.
- Completion: The cycle is complete when you test and find zero ammonia, zero nitrite, and a measurable amount of nitrate. Only then is it safe to slowly introduce your turtle.
Watching Bronte’s tank cycle was a lesson in trust. Seeing those alarming color changes on the test vials-from yellow to green for ammonia, then blue to purple for nitrite-can be unsettling, but it’s the system working. You are not just waiting; you are cultivating an entire ecosystem. Rushing this process compromises your turtle’s immune system, something I advocate against with every fiber of my experience.
Testing and Reading Your Tank’s Water Parameters
Think of water testing like a regular check-up for your turtle’s home. Without this simple habit, you’re essentially guessing about the health of your tank’s environment, which is a disservice to your shelled friend. My tortoise, Austen, lives in a dry habitat, but my aquatic setup for other species taught me that clear water doesn’t mean clean water. Turn this into a routine by setting a regular water quality testing schedule—test weekly or every two weeks and log the results. Regular testing helps you spot trends and time water changes to keep the tank healthy.
How to Perform a Water Test Correctly
Consistency is your best friend here. I test my tanks every single Sunday-it’s as routine as my morning coffee. Getting into a weekly rhythm helps you catch small changes before they become big, smelly problems.
- Gather Your Kit: Use a liquid test kit, like the API Freshwater Master Kit. The strips are tempting for speed, but liquid tests are far more reliable for the delicate balance we need to monitor.
- Sample the Water: Dip your clean test tube vial directly into the tank water. Don’t scoop from the surface or right next to the filter output. Aim for the middle of the water column for a true sample.
- Follow the Recipe: Each test has specific steps. Add the exact number of drops, cap the vial, and shake for the precise time listed. Treat it like a science experiment where your turtle’s wellbeing is the result.
- Read in Good Light: Hold the vial against the white part of the card in bright, natural light. Tilt it slightly to see the true color. Artificial light can trick your eyes.
- Record Everything: Keep a simple log-a notebook or a note on your phone. Jot down the date, each parameter, and any tank changes you made. This log becomes your most powerful tool over time.
One pro tip: rinse those vials with tank water after, not tap water. Tap water can contain chlorine or other residues that might skew your next test, throwing off your careful tracking.
Deciphering Your Results: What the Numbers Mean
Here’s where we translate science into action. Seeing numbers and colors can be confusing, but let’s make it simple.
- Ammonia (NH3/NH4+): You want this at 0 ppm, always. Any reading above 0.25 ppm is a red flag. Ammonia burns skin and eyes. If you see it, it means the cycle isn’t complete or has crashed.
- Nitrite (NO2-): This should also be a steady 0 ppm. Nitrite interferes with your turtle’s blood, preventing it from carrying oxygen. It’s a silent threat you must eliminate.
- Nitrate (NO3-): This is your end product. In a well-planted turtle tank, aim for 20-40 ppm. Below 20 ppm is excellent, but above 50 ppm means you need a water change. High nitrates fuel excessive algae growth.
- pH: Stability matters more than a perfect number. Most turtles do fine between 6.8 and 7.8. A sudden swing in pH is more stressful than a slightly “off” but stable reading, as it can shock their system.
My rule, born from experience, is this: if ammonia or nitrite are present, pause feeding and do a partial water change. For nitrates, a consistent weekly water change of 25-50% is your best management tool. Testing isn’t a chore; it’s the most direct conversation you can have with the invisible world your turtle lives in. Learning its language is the foundation of exceptional care.
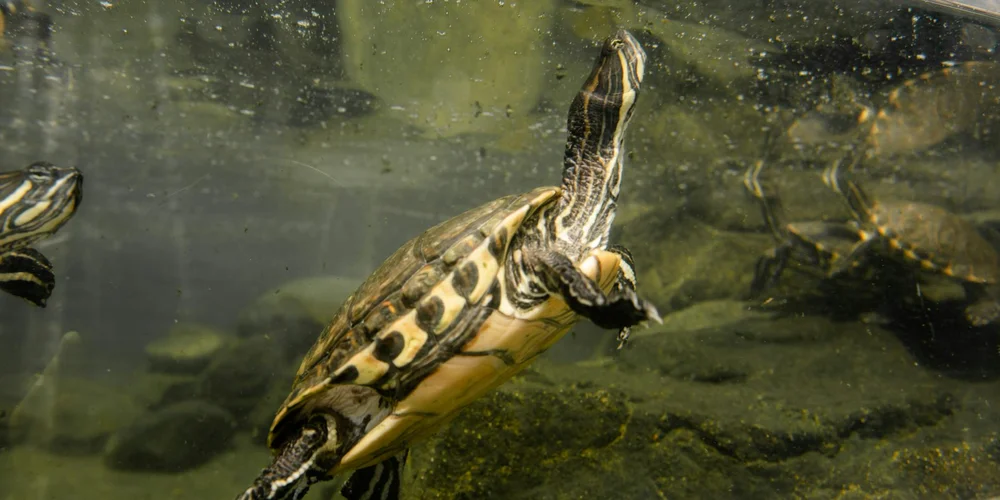
Daily and Weekly Habits for a Thriving Tank Ecosystem
Think of your turtle’s water as their living room, kitchen, and bathroom, all in one. A stable, clean aquatic environment is the single most important gift you can give your shelled friend for their long-term health. I learned this through trial and error with my own crew; Austen, my Russian tortoise, might not swim, but for Bronte and Orwell, their water quality is everything. The goal isn’t sterile perfection, but a balanced, thriving miniature world. Your daily and weekly routines are the gentle rhythms that keep this world in harmony. Keep it simple with daily checks and partial water changes. Schedule a weekly filter maintenance and a monthly deep clean to keep the water crystal clear and healthy.
The Power of Partial Water Changes
You never want to replace all the water in your turtle’s tank at once. A full water change is like an earthquake for the microscopic life keeping your tank safe, wiping out the beneficial bacteria you’ve worked so hard to cultivate. Instead, we use the gentle, steady power of partial changes. I aim for a 25-30% water swap once a week for my aquatic turtles. This practice gracefully removes a portion of the dissolved waste and nitrates before they can accumulate to stressful levels, while leaving the core bacterial colony intact and working.
Here’s my simple, calm process for a stress-free water change:
- Prepare the New Water: I fill a clean bucket with tap water and add a water conditioner to neutralize chlorine and chloramines. I let it sit near the tank for an hour so it can drift toward room temperature. Cold water shocks the system; lukewarm is a gentle hug.
- Gentle Removal: Using a siphon gravel vacuum, I slowly draw out the old water. I hover the vacuum over the substrate to suck up visible debris and waste-this is where that “kitchen and bathroom” cleanup happens.
- Peaceful Return: I pour the fresh, conditioned water back in slowly, perhaps over a clean plate or bowl placed on the substrate. This prevents a raging waterfall from disturbing my turtles and uprooting any plants. Orwell, my box turtle, used to hide for hours after a rushed refill; now, he barely looks up from his snail.
Filter Maintenance Without Crashing Your Cycle
Your filter is the beating heart of the nitrogen cycle, a bustling city for bacteria. The cardinal sin of filter cleaning is using tap water, as the chlorine will massacre your bacterial population and send your tank into a toxic re-cycle. I made this mistake years ago and spent weeks nursing a cloudy, unstable tank back to health. The secret is to clean the mechanical parts without destroying the biological ones.
Follow these steps during your weekly water change to keep the filter humming:
- Unplug the filter. Always. Safety for you and your turtle comes first.
- Remove the filter sponge, pad, or floss (the mechanical media). Squeeze and swish it vigorously in the bucket of old, removed tank water. You’ll see the gunk come out, but the good bacteria, safe from chlorine, will stay within the sponge’s nooks.
- If you have ceramic rings or bio-balls (biological media), only give them a very gentle rinse in the old tank water if they are visibly clogged. Most months, I leave mine untouched. They are sacred ground.
- Never replace all your filter media at the same time. If a sponge is falling apart, swap it with a new one, but place the new one alongside the old one in the filter for a few weeks to let bacteria colonize it first.
This routine is my quiet Sunday ritual. By marrying partial water changes with mindful filter care, you support the cycle rather than fight it, creating a resilient ecosystem where your turtle can simply focus on being a turtle. The water will stay clearer, smell fresher (a healthy tank has a mild, earthy scent, not a foul one), and your pet will be more active and engaged. You’re not just cleaning a tank; you’re tending a world.
Troubleshooting: When the Cycle Goes Wrong

Sometimes, even with our best efforts, the delicate balance in our turtle’s water tips. It’s a bit like a garden; conditions change, and we need to step in to help it flourish again. Knowing how to spot and correct these imbalances quickly is the mark of a truly attentive turtle keeper.
Identifying and Fixing an Ammonia Spike
An ammonia spike is an urgent red flag. The water might smell oddly pungent or “off,” unlike the usual clean, earthy scent of a healthy tank. Your turtle may spend excessive time basking, avoiding the water, or you might notice redness or irritation on their skin or shell.
From my years with Austen, Bronte, and Orwell, I’ve learned that spikes usually have a clear cause. Let’s untangle them.
- Overfeeding is the most common culprit. Uneaten food decays rapidly, flooding the system with waste before your bacteria can handle it. Feed only what your turtle consumes in 5-10 minutes and remove leftovers promptly.
- Filter issues can sneak up on you. Did you recently clean or change the filter media with tap water? Chlorine can wipe out your beneficial bacteria colony. Always rinse media in a bucket of old tank water.
- Overstocking or rapid growth. A tiny hatchling produces less waste than a hefty juvenile. If your turtle has had a growth spurt, the biological filter might need time to catch up to their new, larger waste output.
When you detect a spike, act calmly but swiftly. Your first and best response is a substantial, immediate partial water change of 50-70%. This physically removes the ammonia, giving your turtle immediate relief. Then, test the water daily. You may need to perform smaller 25% changes every other day until levels stabilize at zero. Consider adding a bottled, turtle-safe bacterial booster to help reinforce the colony. Never change all the water or deeply clean the entire tank at once; you’ll reset the cycle you’ve worked so hard to establish.
What to Do If Your Turtle Shows Signs of Stress
Poor water quality is a profound stressor, silently undermining your turtle’s health. Stress signs are their only way to tell us something is wrong. Orwell, my box turtle, becomes reclusive and refuses food. Bronte will swim frantically. Austen simply stops being his steady, curious self.
Watch for these signals. They are a plea for help.
- Lethargy or excessive basking. While turtles love their sun, refusing to enter the water for long periods often means the water itself is the problem.
- Loss of appetite. A turtle skipping a meal can be normal; refusing food for several days is a concern, often linked to their environment.
- Puffy, closed, or irritated eyes. This can be a direct reaction to ammonia or nitrite irritation.
- Soft shell or irregular shedding. Chronic poor water quality prevents proper shell development and health.
If you see these signs, your action plan is clear. First, test your water parameters immediately-ammonia and nitrite must be zero, nitrate under 40 ppm. Perform a major water change as described above to correct the chemistry. Ensure your basking area is at the perfect temperature (a toasty 90-95°F for most species) so their metabolism can function optimally to recover. Offer their favorite food, but don’t panic if they refuse; focus on fixing the water first.
Always remember: persistent stress from bad water is the gateway to serious respiratory infections and shell rot. If symptoms continue for more than 48 hours after you’ve corrected the water quality, a visit to a reptile-savvy veterinarian is non-negotiable. Their well-being hinges on the world we create for them, and clear, clean water is its absolute foundation.
Common Questions
Why do reptiles like turtles produce uric acid rather than urea?
Reptiles, including turtles, produce uric acid as a key adaptation for water conservation. This paste-like waste requires very little water to excrete, which is vital for survival in dry environments. However, turtles still need regular access to water to drink and stay hydrated, and many species rely on aquatic or semi-aquatic habitats to meet their hydration needs.
What role does the gut microbiome play in nitrogen cycling in turtles?
The gut microbiome helps break down food and influences the form and amount of nitrogen released. A healthy microbial balance supports efficient digestion and can affect the waste load entering the tank’s nitrogen cycle.
How is nitrogen recycled within a turtle’s body during metabolism?
Nitrogen from broken-down proteins can be reused to build new amino acids and other essential compounds. This internal recycling helps minimize the total amount of nitrogenous waste the turtle ultimately needs to excrete.
How does environmental temperature affect nitrogen excretion in turtles?
Warmer temperatures generally increase a turtle’s metabolic rate, leading to faster digestion and a higher rate of nitrogenous waste production. Conversely, in cooler temperatures, their metabolism and waste production slow down significantly.
How does the turtle nitrogen cycle compare to that of birds or mammals?
Like birds, most turtles excrete nitrogen primarily as uric acid, while mammals typically excrete it as urea. This fundamental difference is rooted in their evolutionary adaptations for water conservation versus different physiological needs. However, when it comes to diet, aquatic and land turtles have distinct dietary requirements that reflect their varied habitats.
Calm Currents and Clear Water Ahead
Begin your turtle-keeping journey by nurturing the nitrogen cycle with a quality filter and a dash of patience. Regular testing for ammonia, nitrite, and nitrate is the simplest way to ensure your aquatic friend has a safe, clean home.
Owning a turtle, much like caring for my steady Austen or thoughtful Bronte, is a promise to prioritize their welfare through constant learning. Let your curiosity about water chemistry and habitat design grow, because dedicated care builds a deeper, more fulfilling bond with your pet. This essential guide covers land and aquatic turtles, turning curiosity into practical care. From habitat setup to nutrition, it helps you keep your shelled companions thriving.
Further Reading & Sources
- Turtle Tank Nitrogen Cycle – Complete Guide & Diagram
- How do I keep my turtle’s tank healthy? – RSPCA Knowledgebase
- How To Cycle Your Turtle’s Tank
- How To Cycle A Tank: Understanding The Nitrogen Cycle | Exotic PetQuarters
Matthew is a dedicated turtle enthusiast and conservationist with over 15 years of experience in reptile care. Known affectionately as "The Leatherback" among his peers, he combines his passion for turtles with a commitment to educating pet owners on responsible turtle care and environmental stewardship.
Water Quality