Safe Stock Tank Modifications for Thriving Turtles
Published on: February 28, 2026 | Last Updated: February 28, 2026
Written By: Matthew The
You might be wondering if a stock tank can truly provide a hazard-free, enriching environment for your turtle without risking their health or comfort. Having customized tanks for my own turtles, like Orwell the box turtle, I’ve learned that a few thoughtful changes make all the difference.
We’ll explore tank selection, deep cleaning methods, safe material additions, water filtration setup, and basking area design.
Understanding Stock Tank Turtle Housing
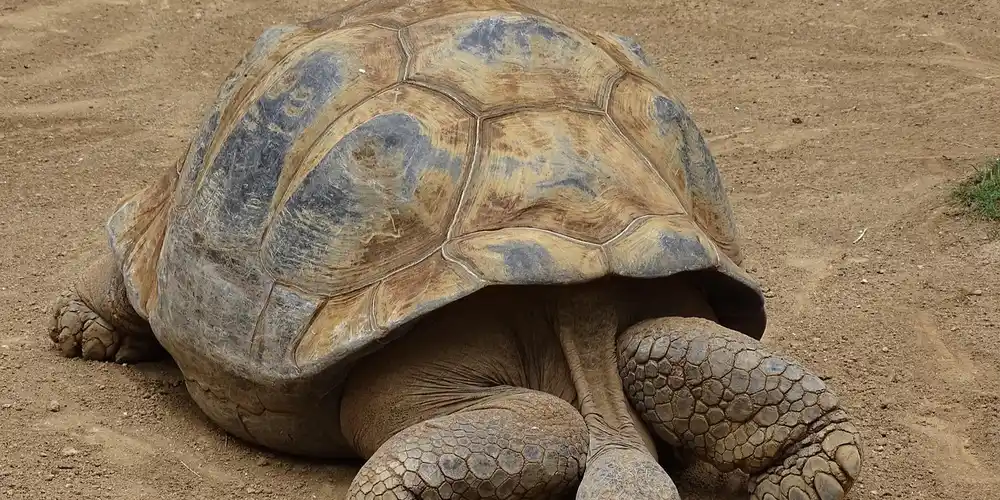
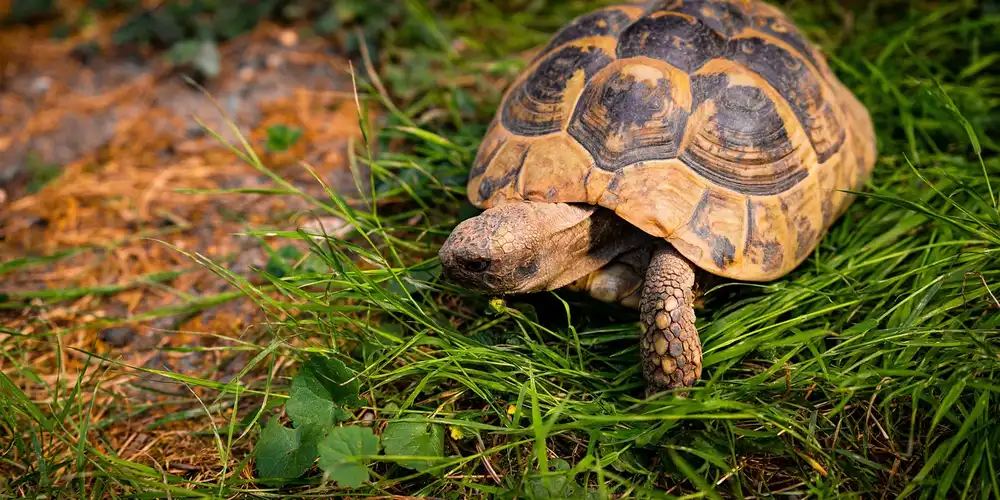
A stock tank is a large, durable container, typically made of galvanized steel or plastic, designed to hold water for livestock. I’ve found their spacious, simple design makes a fantastic foundation for a turtle habitat. My Russian tortoise, Austen, enjoys roaming his modified tank, and the depth is perfect for creating varied terrain.
Modification isn’t just an option; it’s a necessity for turtle health. A plain stock tank lacks the critical features turtles need to thrive, like a proper basking area and secure, dry land. Without these modifications, your turtle can develop serious shell and respiratory issues from being perpetually wet or stressed.
Common reasons for modifying a stock tank include:
- Creating a stable, dry basking platform for thermoregulation
- Installing a safe and effective filtration system
- Building a ramp for easy access in and out of the water
- Adding visual barriers and hiding spots to reduce stress
- Securing the habitat against potential predators or escape
Essential Tools and Safe Materials for Tank Modification
Gathering the right tools before you start makes the process smoother and safer for everyone. You’ll need a few basics: a power drill, a jigsaw with appropriate blades for your tank’s material, a tape measure, a marker, sandpaper for smoothing rough edges, and safety glasses. I always wear gloves to protect my hands from sharp metal or plastic burrs.
Choosing non-toxic materials is the single most important part of this project. Always select sealants labeled as 100% silicone and explicitly marked as aquarium-safe or pond-safe. These are formulated without harmful mildewcides and fungicides that can leach into the water and poison your turtle. For any plastics or building materials, use only those approved for food-grade or aquatic animal contact. Also, avoid substrates and decor that can release toxins or harbor mold. Steer clear of cedar or pine shavings, dyed gravel, or chemically treated woods; choose inert, aquarium-safe options instead.
Here’s how to choose materials that won’t harm your turtle:
- Look for certifications: Aquarium-safe, Pond-safe, or NSF/ANSI 61 for drinking water components.
- Avoid anything with antimicrobial, antifungal, or anti-mold additives.
- When in doubt, contact the manufacturer directly to confirm the product’s safety for reptiles.
- Allow all sealants and adhesives to cure completely, following the manufacturer’s instructions, before introducing your turtle to its new home. The smell is a clear sign it’s still off-gassing.
Preparing Your Stock Tank for Modification
Before adding any features, you need a clean, safe foundation. A well-prepared stock tank prevents injuries and ensures your turtle’s home lasts for years. I learned this the hard way when Austen, my Russian tortoise, nicked his shell on a rough edge—now I never skip these steps. This is the foundation for the essential turtle tank setup, and it leads into a complete daily, weekly, and monthly care guide.
Steps for Initial Cleaning and Inspection
- Rinse the tank with a garden hose to remove loose dirt and debris.
- Scrub thoroughly using a mix of white vinegar and water, which is non-toxic and effective.
- Inspect every inch for rust, sharp spots, or cracks that could harm your pet.
- Rinse again and let it air dry completely before moving forward.
Always check for manufacturing residues, as they can be toxic to turtles like Bronte, who is sensitive to chemicals. A clean start keeps everyone healthy.
How to Create Rounded Edges and Smooth Surfaces
- Use coarse-grit sandpaper to file down any sharp metal edges.
- Switch to fine-grit sandpaper for a polished finish that feels smooth to the touch.
- Apply a pet-safe sealant if needed, especially around welded seams.
Rounded edges reduce the risk of cuts, something I prioritize for Orwell, who loves exploring every corner. Smooth surfaces make cleaning easier and protect delicate turtle skin.
Testing for Leaks and Structural Integrity
- Fill the tank with water and let it sit for at least 24 hours.
- Mark the water level with tape to monitor for drops.
- Check the bottom and sides for bulging or weakness under water weight.
A leak-free tank saves you from messy surprises and keeps your turtle’s environment stable. If you find issues, repair them with aquarium-safe silicone before adding any inhabitants.
Creating the Perfect Aquatic Environment
Water Depth and Filtration Setup
Getting the water right is crucial for your turtle’s health and happiness. Proper depth allows swimming and basking, while filtration keeps the water clean and odor-free. From my experience, each species has unique needs—Orwell, a box turtle, prefers shallow areas, while aquatic types need more depth and effective filtration to maintain water quality.
- For semi-aquatic turtles like box turtles, aim for a depth equal to their shell height.
- Fully aquatic species require water deep enough to swim freely, usually 1.5 times their shell length.
- Install a canister or internal filter rated for twice your tank’s volume to handle waste efficiently.
- Clean filter media monthly to prevent clogs and maintain water quality.
Use a water conditioner to remove chlorine and chloramines, as tap water can irritate turtle eyes and skin. Let treated water sit for an hour before adding it to the tank for best results. For more on how to choose the right conditioner, see the ultimate guide to water conditioners for turtle tanks.
Temperature Control and Heating
Turtles are ectothermic, so they rely on their environment to regulate body temperature. Consistent warmth supports digestion and overall well-being, something I monitor daily for Bronte and Austen. A stable setup prevents stress and illness.
- Choose a submersible heater with an adjustable thermostat and a protective guard.
- Place the heater near water flow to distribute heat evenly, avoiding direct contact with turtles.
- Maintain water temperature between 75-85°F, depending on your species’ needs.
- Use a reliable aquarium thermometer to check temperatures regularly.
Keep all electrical cords dry and use a GFCI outlet to prevent shocks in wet conditions. This simple precaution protects both you and your pets from accidents.
Building Safe Land Areas and Basking Spots
Basking Platform Construction
Creating a basking platform starts with choosing non-toxic, durable materials like slate or untreated wood. From my time with Bronte, my Greek tortoise, I’ve seen how a solid platform encourages natural sunning behaviors without risks. Cut pieces to fit your tank’s dimensions and sand any rough edges to protect delicate turtle feet.
- Designing and building secure basking platforms: Opt for flat surfaces that mimic natural rocks, and attach them with aquarium-safe silicone or suction cups to prevent shifting.
- Proper placement for UVB lighting and heat sources: Position the platform 10-12 inches below UVB and heat lamps to ensure effective exposure without overheating.
- Ensuring platform stability and easy access: Test the setup by gently pressing down; add a gentle ramp or steps so even smaller turtles like Orwell can climb effortlessly.
Ramp Safety and Accessibility
Ramps need a textured surface to prevent slips, much like the rubber mats I use for Austen’s enclosure. A safe ramp angle-around 30 degrees-makes climbing easy and reduces strain on your turtle’s legs. Always secure ramps firmly to avoid tipping during use.
- Creating safe ramps with proper traction: Apply non-slip materials such as outdoor carpet or grip tape, and ensure the ramp width accommodates your turtle’s full body.
- Testing ramp stability and angle: Gently tug on the ramp after installation; if it wobbles, reinforce with additional supports or adjust the attachment points.
- Regular ramp maintenance checks: Inspect weekly for wear, tears, or algae buildup, and clean with a vinegar solution to maintain safety.
Safety Systems and Habitat Security

Stand Stability and Anti-Tip Measures
A stable stand distributes weight evenly to prevent tipping, especially with active turtles like Bronte who love to explore. I always place tanks on level surfaces and use anti-tip brackets for added security after a close call with Orwell’s setup. Check that the stand can handle the tank’s weight when filled with water and decor.
- Ensuring tank stand stability and weight distribution: Choose stands rated for your tank’s capacity, and avoid overloading one side with heavy items.
- Anti-tip precautions for turtle safety: Install L-brackets or straps to anchor the tank to walls, and keep the area around it clear of clutter.
- Regular stability checks: Monthly, gently rock the tank to test for movement, and tighten any loose bolts or fittings promptly.
Lid Safety and Escape Prevention
Mesh lids must fit snugly to block escapes while allowing air flow, a lesson I learned when Austen nearly slipped out. Using sturdy materials like aluminum screen frames prevents bends and gaps that curious turtles might exploit. Balance ventilation by ensuring mesh holes are small enough to stop claws but large for fresh air.
- Designing and installing secure mesh lids: Measure the tank opening precisely, and secure lids with clips or locks to deter pushing or lifting.
- Balancing ventilation with security: Opt for UV-resistant mesh to avoid degradation, and position lids to allow heat and humidity regulation without compromising safety.
- Preventing escapes and predator access: Regularly inspect for gaps or damage, and consider adding a second layer for homes with other pets to keep turtles protected.
Maintaining Your Modified Turtle Habitat
Keeping your stock tank habitat in top shape ensures your turtles thrive for years. I stick to a simple weekly routine with my tortoises Austen and Bronte, which prevents bigger issues down the line. Start by setting aside time each week for a quick check-up and cleaning.
Establishing a Regular Maintenance Schedule
Consistency is your best friend in turtle care. Every Sunday, I dedicate an hour to Austen and Bronte’s home, mimicking their natural cycles without stress. This habit keeps their environment stable and reduces health risks.
- Perform a partial water change of 25-50% weekly to remove waste and refresh the tank.
- Clean filters monthly, but check them weekly for clogs-I learned this after Orwell’s filter failed once.
- Inspect basking areas and substrates for debris or wear, replacing them as needed to prevent injuries.
Monitoring Water Quality and Habitat Conditions
Water quality can make or break your turtle’s health. Test the water pH and temperature weekly using a simple kit; I aim for a pH of 6.5-8.0 and temperatures around 75-85°F for my species. Think of it like checking the weather for your pets—it keeps them comfortable and active. To keep this consistent, add it to a water quality testing maintenance schedule: test weekly, log the results, and adjust water changes as needed. A simple log helps you notice trends and prevent problems before they escalate.
- Watch for cloudy water or unusual odors, which signal bacterial growth or poor filtration.
- Ensure basking spots stay dry and warm, around 90-95°F, to support shell health and digestion.
- Monitor humidity levels, especially for species like Bronte, to avoid respiratory issues.
Adding Habitat Enrichment While Maintaining Safety
Enrichment keeps turtles engaged, but safety comes first. I add smooth rocks and PVC pipe hides for Austen to explore, always checking for sharp edges that could harm his shell. Rotate items every few weeks to spark curiosity without overcrowding. These ideas are part of a turtle enrichment plan—15 ways to prevent boredom in the tank. They help keep Austen engaged and curious.
- Use live plants like java fern or anacharis, which are non-toxic and help filter water naturally.
- Avoid small decorations that could be swallowed; I once removed a tiny ornament after Orwell showed too much interest.
- Introduce floating toys or food puzzles to encourage natural behaviors, like foraging.
Final Safety Checks and Precautions
Before your turtles move in, a thorough check ensures their new home is secure. I always do a “turtle-proof” test run, imagining myself in their place to spot hazards. This step has saved me from potential disasters with my own pets. In a supervised free-roaming setup, extend turtle-proofing to the whole living space. This is part of a home safety guide to keep turtles safe as they explore.
Comprehensive Safety Inspection Checklist
Go through each part of the habitat methodically. Run your hands along all edges and surfaces to feel for rough spots or gaps where a turtle could get stuck. I did this with Bronte’s setup and found a loose ramp that needed tightening. It’s especially important to check the areas designed for basking and hiding.
- Check for secure lids or barriers to prevent escapes, especially with climbers like box turtles.
- Inspect electrical cords and heaters for damage, keeping them away from water to avoid shocks.
- Verify that all decorations and substrates are anchored firmly to prevent tipping or ingestion.
Testing All Systems Before Introducing Turtles
A dry run with empty water and running systems catches problems early. Fill the tank and let filters run for 24 hours, watching for leaks or malfunctions-I learned this after a minor flood with Austen’s first home. Test heaters and lights to ensure they maintain stable temperatures.
- Observe water flow to confirm it’s gentle, avoiding strong currents that could stress turtles.
- Check that basking areas heat evenly and don’t overheat, using a thermometer for accuracy.
- Ensure any ramps or exits are easy for your turtle to use, based on their size and agility.
Ongoing Safety Monitoring and Adjustments
Safety isn’t a one-time task; it evolves with your turtle’s needs. I make it a habit to watch Austen and Orwell daily for any changes in behavior that might signal habitat issues. Adjust elements like water depth or hiding spots as they grow or seasons change. A quick diagnostic checklist for lighting, heat, and water helps you keep the habitat perfect. Diagnosing issues early ensures they stay healthy.
- Regularly reassess the setup for wear and tear, replacing items before they become hazards.
- Keep an eye on social dynamics if housing multiple turtles, separating them if aggression arises.
- Consult a vet if you notice signs of stress, like lethargy or loss of appetite, to rule out environmental causes.
FAQs
How can you insulate a stock tank?
Insulating a stock tank helps maintain stable water temperatures, which is crucial for your turtle’s health and comfort. Use non-toxic materials like foam boards on the exterior, and seal any gaps to prevent heat loss effectively. Additionally, monitor essential water quality parameters—pH, ammonia, nitrites, nitrates, and dissolved oxygen—to help keep the turtle tank healthy.
How to install a drain in a stock tank?
Installing a drain simplifies water changes and improves habitat cleanliness. Drill a hole, fit it with an aquarium-safe bulkhead fitting, and apply silicone sealant to ensure a leak-proof connection.
Are there legal or code considerations for modifying stock tanks in my area?
Legal requirements can vary, so always check local building codes and zoning regulations before starting modifications. Consulting with authorities ensures your setup complies with safety standards and avoids potential issues.
Your Turtle’s Safe Habitat Journey
Focus on using non-toxic materials and proper filtration to create a healthy, stable environment for your turtle. From my time with Orwell, my box turtle, I’ve seen how secure basking areas and ample space prevent stress and support natural behaviors.
Embrace ongoing education about turtle-specific care to refine your approach as your pet grows. Responsible ownership means advocating for animal welfare by staying curious and adapting to new insights for a thriving companion.
Further Reading & Sources
- r/turtle on Reddit: DIY 150 gallon stock tank turtle pond
- My new Turtle Stock Tank | Aquarium Forum
- r/turtle on Reddit: Stock Tank Advice
- Redearslider.com :: View topic – Want to set up stock tank for turtle questions
Matthew is a dedicated turtle enthusiast and conservationist with over 15 years of experience in reptile care. Known affectionately as "The Leatherback" among his peers, he combines his passion for turtles with a commitment to educating pet owners on responsible turtle care and environmental stewardship.
Substrate and Flooring