Diagnosing Your Turtle’s Habitat: A Checklist for Perfect Lighting, Heat, and Water
Published on: March 24, 2026 | Last Updated: March 24, 2026
Written By: Matthew The
Are you worried that your turtle’s home might be missing the right mix of light, warmth, and clean water, putting their health at risk?
This article covers lighting basics, heat gradients, and water parameters, giving you a clear path to a thriving habitat.
Diagnosing Your Enclosure Lighting Setup
Getting the lighting right in your turtle’s home is one of the most impactful things you can do for their long-term health. Proper lighting directly supports their shell strength, metabolism, and overall vitality. I’ve seen the difference it makes with my own crew; a well-lit habitat leads to more active, curious turtles.
Choosing and Positioning Your UVB Light
UVB light is non-negotiable for turtles. It allows them to produce vitamin D3, which is essential for metabolizing calcium for strong bones and shells. Without adequate UVB, turtles can develop metabolic bone disease, a serious and painful condition. My Greek tortoise, Bronte, had a slight shell softness early on that completely resolved once I dialed in her UVB setup.
Here’s how to get it right:
- Select the Right Bulb Type: For most aquatic and semi-aquatic turtles, a linear fluorescent UVB tube is superior to compact coils. It provides a wider, more even distribution of essential rays.
- Mind the Distance: The bulb must be placed at the correct distance from the basking area, typically between 10-14 inches. Check the manufacturer’s specific recommendations, as strength varies.
- Remember the Timer: UVB bulbs degrade over time, even if they still emit visible light. Replace your UVB bulb every 6 to 12 months to ensure it remains effective. I mark the replacement date on my calendar so I never forget.
- Avoid Blockages: Never place glass or plastic lids between the UVB lamp and your turtle, as these materials filter out the crucial UVB rays.
Setting Up the Perfect Basking Lamp and Spot
The basking area is your turtle’s personal sun deck. It’s where they go to dry off, warm up, and digest their food. A proper basking spot encourages natural behaviors and prevents respiratory infections. My box turtle, Orwell, is a basking connoisseur and will let me know immediately if the temperature is even a degree off.
Follow these steps for basking perfection:
- Choose a Ceramic Heat Emitter or Basking Bulb: A ceramic heat emitter provides steady, non-light-emitting heat, perfect for maintaining ambient temperatures overnight. A dedicated basking bulb creates a hot spot for daytime use.
- Achieve the Correct Temperature Gradient: The basking platform surface should be between 90-95°F for most common pet turtle species. Use a reliable digital thermometer with a probe to check this directly at the spot where your turtle sits.
- Create an Inviting Platform: The basking area must be large enough for your turtle to sit completely out of the water and easy for them to climb onto. A flat rock or a commercially available turtle dock works wonderfully.
- Ensure Safety and Stability: All lamps must be securely fixed in a dome reflector and clamped well out of reach of any water splashes or curious climbers to prevent burns or electrical hazards.
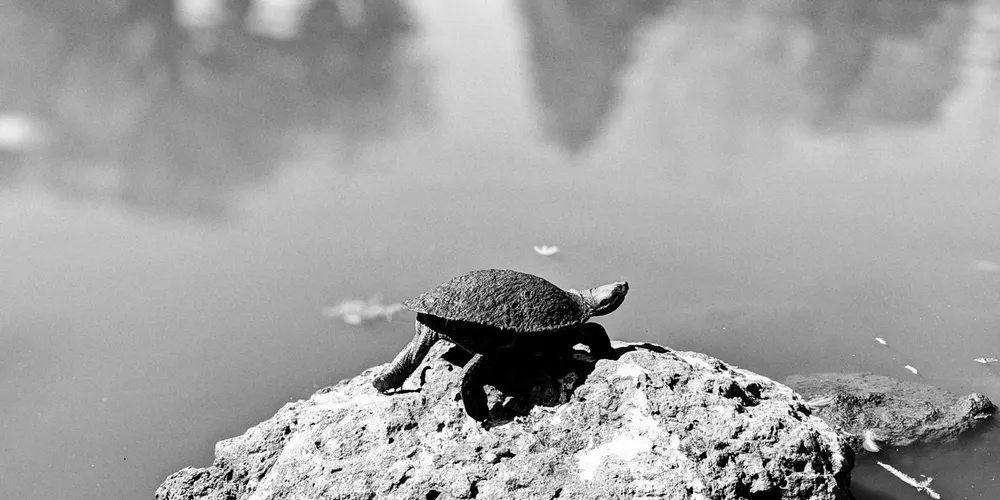
Mapping the Heat and Temperature in Your Turtle’s Home

Finding the Ideal Basking and Water Temperatures
Your turtle’s comfort hinges on precise temperature zones. I learned this firsthand with Austen, my Russian Tortoise, who thrives when his basking area hits 90-95°F and his cooler side stays around 70-80°F. Nighttime temperatures matter too; a stable overnight range helps prevent stress. A quick nighttime heat management guide is to keep a low-watt heat source in place so the enclosure doesn’t drop too cold, and to monitor the overnight temperature with a digital thermometer. Use a reliable digital thermometer to monitor both spots daily.
Water temperature matters just as much for species like box turtles. For Orwell, my Box Turtle, I keep his shallow water dish at 75-80°F to support his reserved but intelligent nature. Nevertheless, ideal water temperatures vary across aquatic turtle species. Some thrive in water slightly cooler or warmer than 75-80°F, depending on their natural habitat. Adjust heaters gradually to prevent stress.
- Basking temperatures: 85-95°F for most species, but check your turtle’s specific needs.
- Water temperatures: 75-80°F for aquatic turtles; slightly cooler for terrestrial ones with water access.
- Cool zone: Maintain 70-75°F to allow natural thermoregulation.
Place heat lamps over a dry, elevated area. A steady heat source prevents shell rot and boosts digestion, something I prioritize for all my turtles’ welfare. Feel the warmth with your hand-it should be cozy, not scorching.
Assessing Water Quality and Filtration
Maintaining Pristine Water Conditions
Clean water is non-negotiable for your turtle’s health. With Bronte, my Greek Tortoise, I change her water bowl every other day to avoid bacterial buildup that could harm her graceful demeanor. Test pH and ammonia levels weekly with a kit. Understanding essential water quality parameters—like nitrites, nitrates, chlorine, and total hardness—helps ensure a genuinely healthy turtle tank. Keeping these in balance supports steady growth and reduces stress for your turtle.
Invest in a quality filter sized for your tank. A canister filter works wonders for larger setups, reducing waste and keeping the water crystal clear. I’ve seen how proper filtration cuts down on algae and odors.
- Perform partial water changes of 25-50% weekly.
- Clean filter media monthly to avoid clogs.
- Use dechlorinator to neutralize tap water chemicals.
Watch for cloudy water or unusual smells. Spotting issues early saved Orwell from potential infections, reinforcing why vigilant care is key to animal welfare. Your turtle will show gratitude through active, healthy behavior. Recognizing when your turtle needs veterinary care is an essential part of this vigilance.
Evaluating Habitat Safety and Enrichment
Start by scanning your turtle’s home for any sharp edges or loose items that could cause injury. I always run my hands over every surface in Austen’s enclosure to feel for rough spots that might scrape his shell. This simple check has saved my Russian tortoise from potential harm more than once. These checks are part of avoiding common enclosure mistakes that can harm terrestrial turtles. Common mistakes to watch out for include sharp edges, loose items, and overcrowding of hides or basking spots.
Provide hiding spots and climbing areas to mimic their natural behavior. Bronte, my graceful Greek tortoise, spends hours exploring the gentle slopes and shaded nooks I’ve added. It keeps her active and reduces stress, which is vital for their well-being.
- Use smooth rocks or logs for climbing-avoid anything with splinters or sharp points.
- Include multiple hideaways to let your turtle retreat when feeling overwhelmed.
- Ensure all decorations are stable and won’t topple over easily.
Check that the habitat has no small objects they could swallow. Orwell, my reserved box turtle, once tried to nibble on a tiny plastic plant, so I switched to all-natural materials. It’s a lesson in prioritizing safety over aesthetics.
Selecting a Safe Substrate and Decor
Choose a substrate that supports digging and is easy to clean. For my tortoises, I use a mix of organic topsoil and coconut coir because it holds moisture without getting muddy. This combo has worked wonders for Austen’s burrowing habits and keeps his shell clean.
Avoid substrates with fine particles that can cause impaction if ingested. Steer clear of sand or gravel for most turtle species-I learned this after Bronte showed signs of discomfort with a sandy base. Opt for chunkier, digestible options instead.
- Test substrates by feeling them for texture and dust levels.
- Select decor made from non-toxic materials like untreated wood or ceramic.
- Rotate items occasionally to keep the environment engaging and prevent boredom.
Incorporate live plants to improve air quality and add enrichment. Adding spider plants and safe herbs has made Orwell’s habitat feel more vibrant and natural. Just research each plant to ensure it’s turtle-friendly and won’t introduce pesticides.
Monitoring Health and Habitat Over Time
Set a weekly routine to inspect the habitat for wear and tear. I check Austen’s heating lamp and water dish every Sunday to catch issues before they escalate. As part of the maintenance schedule, test the tank water parameters (pH, ammonia, nitrite, nitrate) weekly. If any parameter is off, perform a partial water change to restore balance. Consistent monitoring helps you spot small changes that could affect your turtle’s health.
Observe your turtle’s behavior for clues about habitat suitability. If Bronte avoids certain areas, it might mean the temperature or layout needs adjusting. Her graceful movements tell me when everything is just right.
- Record temperature and humidity levels daily to maintain stability.
- Watch for signs of stress, like lack of appetite or excessive hiding.
- Clean and replace substrate regularly to prevent mold and bacteria buildup.
Adjust the habitat based on seasonal changes or your turtle’s growth. As Orwell has aged, I’ve added more flat surfaces for easier movement. It’s a gentle way to support his reserved but intelligent nature over the years.
FAQs
Is there a reliable food source present?
Yes, provide a balanced diet with commercial turtle pellets, fresh vegetables, and occasional protein sources like insects. This approach helps you create a balanced diet for your omnivorous turtle. To support variety and prevent overfeeding, track portions carefully. Regularly monitor feeding to ensure consistency and adjust portions based on your turtle’s age and activity level.
Are there barriers to prevent predators from entering?
Use secure lids or enclosures to protect against household pets or other potential threats. Inspect the habitat regularly for any openings or damage that could compromise safety.
Is there human disturbance in the area?
Position the habitat away from high-traffic zones to minimize stress from noise and activity. Maintain a consistent routine to help your turtle feel secure and reduce anxiety. By setting it straight on common habitat myths—like the belief that UVB lighting isn’t necessary—you can better protect your pet. Check out Setting it straight for more guidance.
Your Turtle’s Habitat Harmony
From my decade with Austen, my Russian tortoise, I’ve learned that perfecting your turtle’s habitat hinges on providing consistent UVB lighting for shell health, stable heat gradients for comfort, and clean, accessible water for hydration. Getting these elements right transforms their enclosure into a thriving mini-ecosystem where they can eat, bask, and explore with vitality. It’s crucial to ensure your habitat meets the essential heating and lighting requirements.
Owning a turtle is a rewarding journey that asks for your attentive care and willingness to grow alongside your pet’s needs. Stay curious, observe their behaviors closely, and keep learning about turtle care to ensure a long, joyful life together.
Further Reading & Sources
- The ideal lighting for aquatic turtles
- r/turtles on Reddit: What light should I use for an aquatic turtle?
- Maintaining the Perfect Temperature: Turtle Heat Lamp and Water Heater Guide – Talis Us
- Turtle Basking Light: Enhance Your Turtle’s Habitat with the Perfect Lighting – Talis Us
Matthew is a dedicated turtle enthusiast and conservationist with over 15 years of experience in reptile care. Known affectionately as "The Leatherback" among his peers, he combines his passion for turtles with a commitment to educating pet owners on responsible turtle care and environmental stewardship.
Heating and Lighting