A Visual Guide to Turtle Shell Damage: Types and Meanings
Published on: February 17, 2026 | Last Updated: February 17, 2026
Written By: Matthew The
Spotting a crack, soft spot, or odd color on your turtle’s shell can make your heart race with concern for their well-being.
I’ve felt that worry myself while caring for my tortoises Austen, Bronte, and Orwell, and I’m here to help you calmly identify and understand what you’re seeing.
This guide visually explains common shell issues, their causes, treatment steps, and prevention methods to support your turtle’s health.
Why Your Turtle’s Shell Health Is Crucial
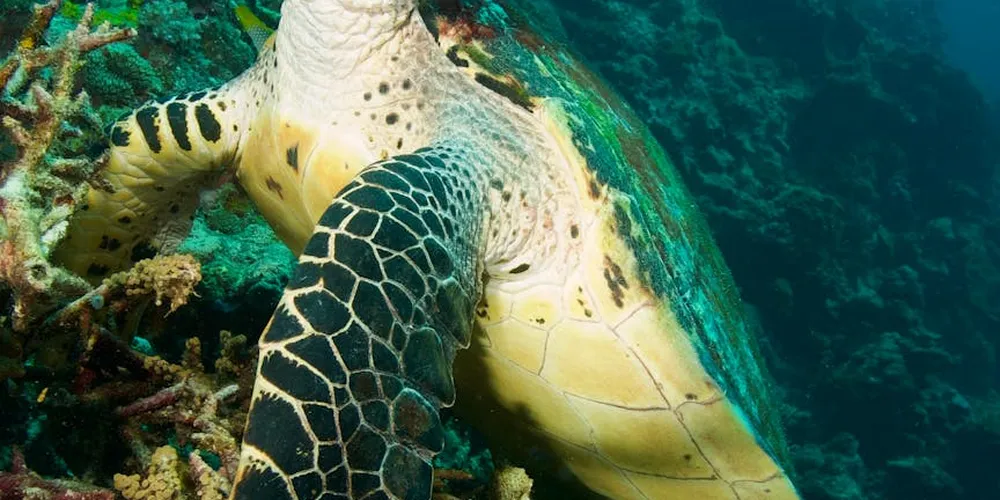
Think of your turtle’s shell as their personal home, shielding them from injuries and environmental threats. This bony structure fused to their spine acts like a mobile fortress, safeguarding their heart, lungs, and other vital organs. In turtle anatomy, the shell consists of a carapace and plastron, bones fused to the spine and ribs, with keratinous scutes on the surface. I’ve seen how a sturdy shell keeps my tortoises, Austen and Bronte, safe during their slow, deliberate explorations.

Damage to the shell isn’t just cosmetic-it can open the door to severe health problems. Even minor cracks or soft spots can lead to painful infections or metabolic bone disease, where the shell weakens and deforms over time. When Bronte developed a small chip from bumping into a rock, I learned that prompt care prevented a bacterial invasion.
Staying vigilant with regular shell checks helps you catch issues early. My gentle Austen taught me that a healthy shell means a happier, more active turtle, free from hidden ailments. Always advocate for their well-being by monitoring any changes closely. Knowing what to watch for helps you spot the most critical health issues early. Stay vigilant for signs like changes in appetite, breathing, or shell appearance.
A Visual Guide to Common Turtle Shell Damage Types
Recognizing different shell issues allows you to respond quickly and effectively. Use this guide to identify problems like cracks, chips, or discoloration, and understand their underlying causes. This shell problem diagnostic checklist covers rot, pyramiding, and other injuries to help you pinpoint issues fast. With these steps, you can take timely care to protect your turtle. I’ll share visual descriptions based on years of caring for my own turtles.
Damage can stem from trauma, poor habitat, or nutritional gaps. For instance, sticky traps often leave gouges, while shell edges may show wear from rough surfaces. Let’s break down the main types you might encounter.
Shell Cracks and Fractures
These appear as lines or breaks on the carapace (top shell) or plastron (bottom shell). Falls or heavy impacts cause fractures, which risk internal injuries if deep enough. Orwell once had a minor crack from a tumble, reminding me to secure his enclosure.
- Check for depth: Superficial cracks might only affect the outer layer, while deep ones expose sensitive tissue.
- Look for bleeding or swelling, which signal urgent care is needed.
- Assess mobility-if your turtle struggles to move, the damage could be severe.
Shell Rot and Infections
Bacterial or fungal infections create soft, discolored patches that may smell unpleasant. Poor water quality or untreated wounds often trigger these issues, leading to erosion or blister-like sores. I noticed Bronte’s shell had a mushy spot from lingering moisture, which cleared up with better habitat maintenance.
- Watch for areas that feel spongy or show unusual colors like white, green, or black.
- Inspect for pus or a foul odor, indicating advanced infection.
- Link symptoms to enclosure hygiene-clean, dry spaces prevent most cases.
Surface Changes: Flaking, Pitting, and Blisters
Flaking looks like dry, peeling scales and often points to dehydration or low humidity. Pitting involves small dents or holes, commonly tied to calcium deficiency or inadequate UVB light, which can progress to metabolic bone disease. Austen’s shell once showed slight pitting, alerting me to boost his calcium intake.
- Spot early flaking by noting dull, brittle areas that peel easily.
- Identify pitting through tiny depressions that feel rough to the touch.
- Recognize blisters as raised, fluid-filled bumps, sometimes from burns or fungal issues.
What Causes Shell Damage in Pet Turtles?
Seeing a crack or discoloration on your turtle’s shell can be worrying. I’ve felt that knot in my stomach with my own tortoises. The causes generally fall into two categories: physical injury and underlying health problems.
Common Physical Causes
These are often the result of an accident or an unsuitable environment.
- Trauma from Handling: Dropping a turtle, even a short distance, can cause fractures. Always handle them low over a soft surface.
- Fights with Tank Mates: Even seemingly peaceful species can become territorial. My Greek tortoise, Bronte, once took a small chip out of Austen’s shell over a favorite basking spot.
- Improper Habitat Setups: Sharp rocks, falls from high platforms, or getting a leg stuck in a decor gap are common hazards.
Health-Related Causes
These issues weaken the shell from the inside out, making it prone to damage.
- Dehydration: A dry turtle is a fragile turtle. Their shells need moisture to stay resilient.
- Calcium Imbalance: Without enough calcium and proper Vitamin D3, the shell becomes soft and pliable, a condition known as Metabolic Bone Disease.
- Lack of UVB Light: Turtles cannot process calcium without UVB light. It’s non-negotiable for shell health.
Prevention Tips from My Experience
An ounce of prevention is worth a pound of cure, especially in reptile care.
- Design enclosures with smooth, rounded rocks and secure, low-to-the-ground hides.
- Provide a shallow water dish large enough for soaking to prevent dehydration.
- Use a high-quality UVB bulb and replace it every 6-12 months, as the output diminishes long before the light dies.
- I learned the hard way with Orwell; a seemingly minor habitat tweak prevented a much larger injury.
How to Assess the Severity of Shell Damage
Not every scratch requires a panic-driven vet visit. A calm, methodical assessment will help you determine the best course of action. Here is a simple grading system I use.
A Simple Grading System
- Mild (Surface Only): Superficial scratches, minor scuffs, or slight discoloration. The shell’s structure is intact.
- Moderate (Deeper Layers): Visible cracks or pits that do not expose the tissue beneath. You might see a white, chalky layer.
- Severe (Exposing Tissue): Any crack, hole, or wound that reveals pink, red, or bloody tissue underneath. This is a critical situation.
Steps to Check for Infection or Pain
After grading the damage, look for these red flags.
- Gently smell the area. A foul, rotten odor almost always indicates a serious infection.
- Look for pus, unusual swelling, or a soft, mushy texture around the wound.
- Observe your turtle’s behavior. Is it lethargic, refusing food, or favoring one side? These are signs of pain.
Home Care vs. Veterinary Care
Knowing when to treat at home and when to seek professional help is a vital skill.
Home care is often sufficient for mild cases. Keep the habitat impeccably clean, ensure proper nutrition and UVB, and monitor for changes. A superficial scratch will often heal on its own with good husbandry.
Any moderate or severe damage warrants a vet visit. Cracks can allow bacteria into the body cavity, leading to systemic infection. A reptile veterinarian can properly clean the wound, apply medical-grade sealants, and prescribe antibiotics if needed. When my box turtle Orwell had a moderate crack, a vet visit gave me peace of mind and the right supplies for his recovery.
First Aid and Home Care for Shell Damage
Seeing damage on your turtle’s shell can be worrying, but you can take some safe initial steps at home. If you’re wondering how to tell if your turtle is sick, look for other signs such as changes in appetite, activity, or breathing. Your calm and careful actions can make a big difference in their comfort and recovery.
Safe Cleaning for Minor Wounds
For small scrapes or superficial cracks, gentle cleaning is your first priority.
- Prepare a saline solution using warm, distilled water and a small amount of non-iodized salt.
- Use a soft, clean cloth or cotton swab to gently dab the area, removing any loose debris.
- Pat the area dry with a fresh paper towel to prevent moisture from getting trapped.
- Apply a very small amount of a mild, veterinary-approved antiseptic like chlorhexidine solution.
Avoid using hydrogen peroxide or alcohol, as these can damage delicate new tissue and slow healing.
Using Topical Ointments Like Neosporin
Plain Neosporin (the version without pain relief) can sometimes be used for minor wounds.
- Apply only a thin layer directly to the affected area, not the surrounding healthy shell.
- Limit use to a maximum of three to five days unless your vet advises otherwise.
- Watch closely for any irritation or changes in the shell’s appearance and discontinue use if you see any.
Prolonged antibiotic use can lead to resistance, so it’s best used as a short-term bridge until you can consult a professional.
Vet-Approved Home Remedies
I am very cautious about home remedies. The only one I ever use, and only with my vet’s explicit approval for a specific case, is a thin layer of raw, unpasteurized honey on a clean wound. Its natural antibacterial properties can be helpful, but you must always get the green light from your veterinarian first. Animal welfare means not experimenting on our pets.
A Personal Story with Orwell
My box turtle, Orwell, once came in from the yard with a fresh, shallow scrape on his carapace. It wasn’t deep, but I knew it needed attention. I gently cleaned it with a saline solution and applied a tiny dab of plain Neosporin for two days. Keeping his enclosure extra clean and dry was just as important as the ointment itself. He healed perfectly, but I was ready to call the vet at the first sign of anything unusual.
Immediate Steps for Shell Trauma
If you discover a more serious injury, your immediate response is critical.
- Gently clean the area with a saline solution to remove dirt and prevent initial contamination.
- Move your turtle to a clean, quiet hospital tank with a paper towel substrate to protect the wound.
- Monitor their behavior, appetite, and the injury itself closely for any changes over the next few hours.
Never attempt to glue a shell, tape it, or use any DIY method to “fix” a fracture yourself. You can cause far more harm than good, leading to severe infections or permanent deformities.
When to Seek Veterinary Help for Shell Damage
Knowing when home care isn’t enough is a vital part of being a responsible turtle keeper. When in doubt, a vet visit is always the safest choice for your shelled friend. If you notice signs such as a sudden appetite loss, lethargy, swelling, or shell changes, it’s a good moment to seek veterinary advice. Prompt care can prevent small problems from turning serious.
Major Red Flags
Some signs mean you need to pick up the phone and call your reptile vet immediately.
- Any crack or fracture where you can see pink tissue or bone underneath.
- Bleeding that doesn’t stop with gentle, direct pressure.
- Signs of infection like pus, a foul smell, or soft, discolored areas around the wound.
- Your turtle becomes lethargic, stops eating, or shows other sudden behavioral changes.
Lethargy is a particularly telling sign that the body is fighting something serious internally.
Veterinary Diagnosis Processes
Your vet has tools to see what’s happening beneath the surface. They will likely perform a physical exam and may recommend an X-ray. An X-ray can reveal hidden fractures, check for bone infection, and even see if any shell fragments have been pushed inward. They might also take a small sample of any discharge to identify the specific bacteria causing an infection.
The Importance of Prompt Action
I’ve learned that shell injuries are a race against infection. The sooner a vet can properly clean a deep wound, debride damaged tissue, and start the correct antibiotics, the better the outcome. Delaying care by even a day or two can turn a manageable injury into a life-threatening situation. I’ve seen cases where prompt vet intervention saved a turtle’s shell and its life, reinforcing that our vigilance is their best defense.
Preventing Future Shell Damage in Your Turtle
-
Focus on a balanced diet rich in calcium to support strong shell growth and repair. I feed Austen, my Russian Tortoise, a mix of dark leafy greens like kale and dandelion greens, supplemented with a light dusting of calcium powder twice a week. Consistent calcium intake helps prevent soft shells and deformities that I’ve seen in neglected turtles. For Bronte, the Greek Tortoise, I include cuttlebone in her enclosure-she gnaws on it naturally, much like wild turtles would. Orwell, the Box Turtle, enjoys calcium-rich snails and worms as part of his varied diet, which mimics his natural foraging habits and keeps his shell resilient.
-
Provide adequate UVB lighting to enable proper calcium absorption and overall shell health. Without it, turtles can develop metabolic bone disease, leading to weak, damaged shells. UVB exposure is not optional—it’s essential for calcium metabolism and shell strength, especially for indoor enclosures. Properly setting up UVB lighting ensures your turtle can utilize calcium and maintain healthy bones. I use a high-quality UVB lamp for Bronte’s habitat, positioned at the right distance and replaced every six months to ensure effectiveness. From my experience, this simple routine has kept all my turtles—Austen, Bronte, and Orwell—active and free from shell issues linked to poor lighting. Set a timer for 10-12 hours daily to mimic natural daylight cycles, and always check that basking spots are warm and accessible.
-
Create a safe tank environment by removing sharp objects and ensuring smooth surfaces to prevent cuts and abrasions. If you’re using a stock tank, plan safe modifications first to preserve integrity and ensure a sealed, watertight setup. Use non-toxic sealants and smooth any rough edges to prevent injuries during modifications. I designed Orwell’s enclosure with rounded rocks and soft substrate after noticing how his reserved nature made him prone to hiding in tight spots. A clutter-free habitat reduces the risk of injuries that can lead to infections or shell cracks. For aquatic setups, maintain clean water with proper filtration to avoid bacterial growth-something I prioritize for Austen’s semi-aquatic needs. Regularly inspect and adjust decorations to keep everything turtle-friendly and stress-free.
-
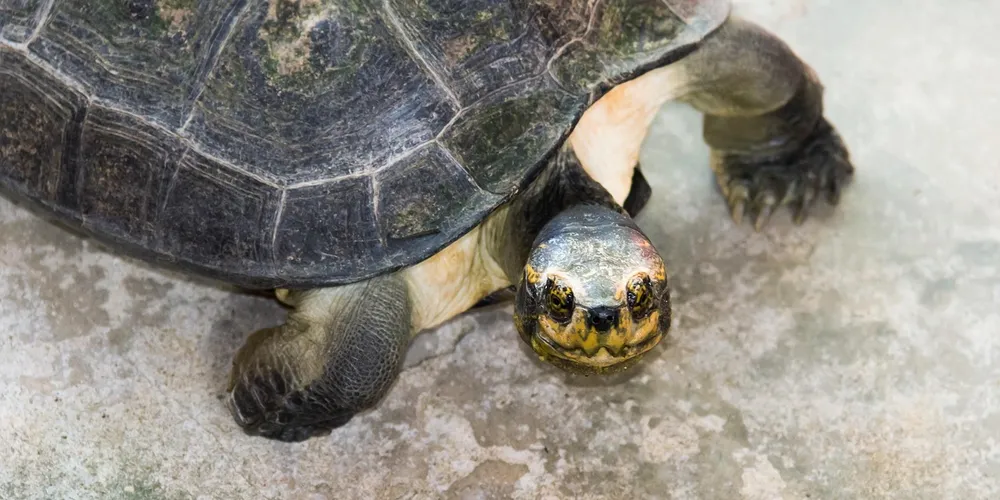
Conduct weekly shell inspections to catch early signs of damage, such as discoloration, soft spots, or unusual growths. I gently examine Austen’s brown and tan shell every Sunday, feeling for any changes in texture. Early detection allows for quick intervention, preventing minor issues from escalating into serious health problems. With Bronte’s graceful demeanor, she tolerates these checks well, and I often use the time to bond with her. Look for parasites, cracks, or retained scutes, and note any behavioral shifts that might indicate discomfort.
-
Establish a habitat maintenance routine that includes daily spot-cleaning and monthly deep cleans to uphold hygiene. I clean Bronte’s tank thoroughly each month, removing waste and refreshing substrates to prevent mold and bacteria. This is part of my ultimate turtle habitat cleaning schedule, designed to keep every corner of the tank spotless. Consistent upkeep not only supports shell integrity but also boosts your turtle’s overall well-being and longevity. For Orwell, I check water quality and temperature regularly, as even small imbalances can stress his shell. This habit has helped me avoid common pitfalls, like shell rot, that I’ve encountered in rescue cases. Sticking to this schedule helps ensure consistent conditions for Bronte and Orwell.
-
Draw from diverse experiences with multiple turtles to tailor care-each species has unique needs. Austen’s steady personality means he thrives in a predictable routine, while Bronte’s thoughtful nature requires more environmental enrichment to prevent boredom-related shell picking. Observing their individual behaviors has taught me that personalized attention is key to effective prevention. Orwell’s intelligence, for instance, led me to add puzzle feeders to his habitat, reducing stress and promoting natural shell wear. By adapting these practices, you can build a resilient care plan that evolves with your turtle’s life stages.
FAQs
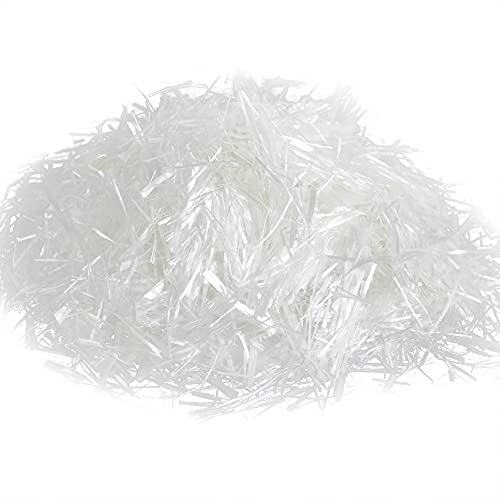
How should I treat shell damage from a sticky trap?
Gently remove any adhesive residue with warm water and a soft cloth to prevent further injury. Clean the area with a saline solution and monitor for infection, as sticky traps can cause deep gouges that may need veterinary attention.
What does damage along the edges of a turtle’s shell indicate?
Damage along the edges often stems from dehydration or constant rubbing against rough surfaces in the habitat. It can also point to nutritional deficiencies, so review your turtle’s diet and enclosure setup for potential causes.
How long can I use Neosporin on turtle shell damage?
Limit Neosporin application to 3-5 days unless your veterinarian advises otherwise to avoid antibiotic resistance. Always use the plain version without pain relief and discontinue if irritation occurs.
Are there any safe home remedies for turtle shell damage?
Raw, unpasteurized honey is sometimes vet-approved for minor wounds due to its natural antibacterial properties. However, never use home remedies without consulting a professional, as improper treatments can worsen the damage.
Can I use Neosporin ointment on my turtle’s shell?
Yes, but only apply a thin layer of the plain Neosporin ointment directly to the affected area and avoid the surrounding healthy shell. Stop use and seek veterinary advice if you notice any redness, swelling, or behavioral changes in your turtle.
Your Turtle’s Shell Health: A Final Word
Regularly check your turtle’s shell for cracks, discoloration, or soft spots to catch issues early. Prompt veterinary care can prevent minor damage from turning into serious health problems. From my experience with Austen, Bronte, and Orwell, I’ve learned that shell inspections are as routine as feeding time.
Commit to ongoing education about pet turtle care to adapt as your turtle ages. Responsible ownership means creating a safe habitat and staying curious about their well-being. I’ve seen how small changes in care, based on continuous learning, make a big difference in their quality of life.
Further Reading & Sources
- Shell injuries in tortoises – Veterinary Practice
- Turtle Shell Repair: Let’s Get Crackin’ Julia Becker, DVM, MS
- Shell Repair In Chelonians
- FILLING IN THE CRACKS… SHELL FRACTURES IN TURTLES
Matthew is a dedicated turtle enthusiast and conservationist with over 15 years of experience in reptile care. Known affectionately as "The Leatherback" among his peers, he combines his passion for turtles with a commitment to educating pet owners on responsible turtle care and environmental stewardship.
Signs of Illness