Hatchling to Juvenile: What to Expect in Your Turtle’s First Year
Published on: November 23, 2025 | Last Updated: November 23, 2025
Written By: Matthew The
That tiny shell in your hand holds a world of wonder, and yes, a sprinkle of worry-I remember the first time I held Austen, my Russian tortoise hatchling, her brown and tan shell feeling like warm stone under my fingers. Your new companion is fragile, and those early days shape their entire life, so it’s natural to feel overwhelmed.
Based on raising Austen, Bronte, and Orwell, I’ll guide you through the essentials: habitat setup, feeding routines, growth milestones, and health checks. Think of this as your map for a calm, confident journey from hatchling to sturdy juvenile.
Understanding the Growth Timeline: Hatchling to Juvenile
The first year is a quiet spectacle of transformation. Your little one will change from a delicate, coin-sized explorer into a robust, personality-filled youngster. Tracking these milestones isn’t about strict schedules, but about observing the beautiful, natural rhythm of their development. Watching my three grow at their own paces taught me that flexibility is key.
Your Turtle’s First-Year Milestones
Here’s a general roadmap of what to expect. Remember, species and individual care create variation. A Russian tortoise like Austen grows differently than an aquatic slider.
- Months 1-3: The Delicate Settling-In Phase
Your hatchling is learning the world. They may be shy, eating sporadically, and sleeping often. This is a critical time for establishing a stress-free routine with perfect temperatures and humidity. Bronte, my Greek tortoise, spent her first two months mostly buried in her hide, which was perfectly normal for her species. - Months 4-6: Active Growth and Personality Emergence
Appetite increases noticeably! You’ll see more confident exploration and the start of unique behaviors. Shell growth becomes visible as new, pale keratin forms around each scute (the individual shell plates). This is when Orwell, my box turtle, first showed his cleverness by figuring out how to nudge his food dish. - Months 7-9: Strength and Definition
The shell hardens and gains more color definition. Legs and neck become stronger. You’ll observe clearer species-specific traits, like digging in tortoises or more agile swimming in aquatics. This is often when the tentative hatchling truly starts to feel like a “juvenile.” - Months 10-12: The Confident Juvenile
By their first birthday, your turtle has typically doubled or tripled its hatchling weight. Their personality is now a consistent part of your daily interaction. They are sturdier, more predictable in their habits, and fully transitioned from the fragile hatchling stage. Austen’s steady, gentle nature was fully apparent by this point.
Building the Foundation: Habitat Setup for First-Year Turtles
Think of the enclosure as their entire world. For a growing turtle, this world must be safe, stimulating, and adaptable. A proper setup isn’t a luxury; it’s the bedrock of their health and your peace of mind. I’ve built and rebuilt habitats over the years, learning that a good start prevents countless issues later.
Step-by-Step Enclosure Setup
- Choose the Right Size: Start with a tank or tub that seems too big. Hatchlings use more space than you think. Plan for growth-a 40-gallon breeder tank is a good minimum start for many aquatic species.
- Prioritize Safety: All heating elements (lamps, water heaters) must be turtle-proofed with guards. Ensure the lid is secure and there are no small gaps for escape.
- Install Core Systems First: Set up your heat lamp, UVB lamp, and any water filtration *before* adding substrate or decor. This lets you dial in temperatures perfectly.
- Add Substrate and Landscaping: Choose species-appropriate substrate (see below). Add hides, smooth rocks, and plants (real or silk). Avoid anything with sharp edges.
- Final Safety Check: Feel all surfaces for roughness. Ensure nothing can topple over. Check that the basking platform is easily accessible and stable.
Selecting the Right Substrate
This is where species needs truly diverge. The wrong floor can lead to impaction, stress, or shell issues.
- For Diggers like Bronte (Greek Tortoise): A deep mix of organic topsoil and play sand lets them perform natural burrowing behaviors. This provides crucial mental stimulation and humidity control at their level.
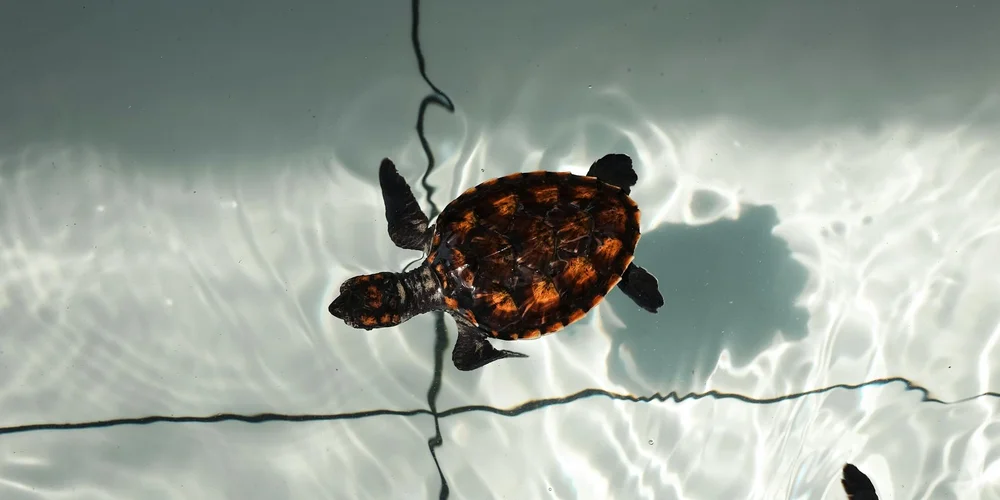
- For Aquatic Turtles: Large, smooth river rocks or bare-bottom tanks are safest. Small gravel is a severe impaction risk and must be avoided entirely. I use large slate pieces for my aquatic setups.
- For Forest Dwellers like Orwell (Box Turtle): They need humidity retention. A mix of coconut coir, sphagnum moss, and leaf litter works wonderfully, mimicking the soft forest floor.
Mastering Water and Humidity
For aquatic turtles, water quality is non-negotiable. A filter rated for two to three times the tank’s volume is the minimum. Perform partial water changes weekly. Integrate a simple turtle tank water quality testing routine into your maintenance schedule. Test pH, ammonia, nitrite, nitrate, and chlorine weekly and log the results. For tortoises like Austen and Bronte, humidity is the silent guardian against pyramiding (abnormal shell growth). I achieve this with a deep, moist substrate, a large water dish for soaking, and occasional misting, always monitoring with a digital hygrometer.
Aquatic vs. Terrestrial Habitat Needs
Caring for both aquatic and terrestrial turtles has shown me their worlds are opposites, yet the principles are the same: replicate their natural needs.
| Aquatic Focus | Terrestrial (Tortoise) Focus |
|---|---|
| Water Depth: Should allow swimming but permit easy reaching of the surface. For hatchlings, start with depth just over their shell length. | Land Area: Maximum floor space is critical for exercise. Vertical height is less important. |
| Filtration: A robust canister or powerful internal filter is mandatory to handle waste and keep water clean. | Ventilation: While humidity is needed, stagnant air causes respiratory illness. The enclosure needs a gentle cross-flow of air. |
| Basking Area: Must be completely dry, easily accessed, and large enough for the turtle to fully leave the water and thermoregulate. | Basking & Hiding: Requires a distinct, warm basking zone and multiple cool, dark hides to feel secure across the temperature gradient. |
| Personal Note: My aquatic setups always have a “kidney dish” shaped basking rock. It prevents tiny hatchlings from getting stuck. | Personal Note: For Austen and Bronte, I created a “humid hide” packed with moss inside their main enclosure, giving them a choice. |
Nourishing Growth: Diet and Feeding in the First Year
Watching a turtle grow is a quiet miracle, fueled by the food you provide. In that first year, every bite is building the foundation for a long, healthy life, making your choices in the kitchen absolutely pivotal. I learned this intimately with Orwell, my box turtle, whose appetite seemed to double overnight as he hit his juvenile stride.
Essential Building Blocks: More Than Just Salad
Think of your turtle’s shell and skeleton as a living sculpture, constantly being remodelled. Two artists work on this project: calcium and vitamin D.
- Calcium: This is the primary building material. Without ample calcium, a turtle’s shell can become soft and malformed, a condition known as Metabolic Bone Disease (MBD).
- Vitamin D3: This is the foreman that tells the body where to put the calcium. Turtles synthesize D3 naturally when exposed to proper UVB lighting, but some also benefit from dietary sources. It’s a powerful partnership; one cannot work without the other.
The Rhythm of Feeding: Appetite Through the Ages
A hatchling’s metabolism is a tiny, humming engine. A juvenile’s is a steady, reliable motor. Their feeding schedule should reflect this shift.
- Hatchlings (0-6 months): Offer a small amount of food daily. Their stomachs are about the size of their head, so portions should be tiny and nutrient-dense.
- Juveniles (6-12 months): You can begin transitioning to feeding every other day. This slower pace encourages natural foraging behavior and prevents obesity, a common issue in captive turtles. Watch your turtle’s behavior and body condition-plump legs are good, a shell that bulges over the legs is a sign to cut back.
Diet Progression: From Starter Food to Sophisticated Palates
The menu evolves as your turtle does. Here’s a simple progression I’ve followed with all my shelled companions.
- The Hatchling Base: Start with a high-quality commercial pellet formulated for baby turtles. These are fortified with the right balance of nutrients. Moisten them slightly for easier eating.
- Introducing Variety: Within the first few months, begin adding tiny, tender greens. Ripped-up bits of dandelion greens, kale, and bell pepper are perfect. For species like Orwell (an omnivore), include minuscule amounts of protein, like a single soaked reptile worm or a speck of boiled egg.
- The Juvenile Plate: By six months, the diet should be more diverse. For my herbivores, Austen and Bronte, a plate is 80% leafy greens and 20% chopped veggies like squash and carrot. For Orwell, it’s 50% plant matter and 50% protein sources like earthworms and insects.
Supplements for Strong Shells and Bones
Even the best diet sometimes needs a boost. This is where supplements come in, acting as a nutritional safety net.
I lightly dust the food of my turtles with a plain calcium carbonate powder (without added D3) about three times a week. For growing hatchlings, I do this almost every feeding. The key is a very light coating-think of a faint dusting of powdered sugar. You can also offer a pure calcium block in the enclosure for them to nibble on as they feel the need.
This simple practice is your strongest defense against Metabolic Bone Disease, a heartbreaking and preventable condition. A turtle with MBD may have a soft, pyramided shell, swollen limbs, and lack the strength to walk properly. By ensuring a calcium-rich diet paired with correct UVB lighting, you are actively building resilience into every scute and bone. Watching Bronte, my Greek tortoise, glide smoothly across her enclosure with a strong, domed shell is a direct testament to this consistent, careful approach.
Environmental Essentials: Lighting, Heat, and Humidity
Picture your turtle’s first home as a tiny, sun-dappled forest floor or a shallow, warm pond edge. Getting the environment right isn’t just about comfort; it’s about building a foundation for a long, healthy life. I learned this early with Austen, my gentle Russian tortoise. His brown and tan shell stayed perfectly hard because I focused on three pillars: light, heat, and moisture.
The Sun in a Bulb: Why UVB is Non-Negotiable
UVB lighting is what lets your turtle use the calcium in its food. Without it, their bodies can’t build strong bones or shells. Think of it as their daily dose of sunshine, vital for every function. I use a linear fluorescent UVB tube that spans half the enclosure, replacing it every six months because the output fades long before the light dies. Proper UVB setup is essential to prevent metabolic bone disease and ensure calcium absorption. Place the UVB source at the recommended distance from the basking area and replace it on schedule so the rays stay strong. For hatchlings, who are growing rapidly, this artificial sun is their most critical resource. A soft shell, like a sponge, is a heartbreaking sign this is missing. For more information, check out the article on proper UVB setup, as well as other important aspects like ‘UVB lighting for turtles’ and why ‘UVB lighting is essential.’
Crafting the Perfect Basking Lounge
Your turtle needs choices. A proper basking area creates a temperature gradient, letting them move from warm to cool as they please. This is how you create the perfect basking area for your aquatic turtle. Here is how I set it up for my crew:
- Pick the Spot: Position a flat rock or slate under the heat lamp at one end of the habitat.
- Control the Heat: Use a ceramic heat emitter or basking bulb on a thermostat. Aim for a basking surface temperature between 90-95°F for most species.
- Check the Cool Side: The opposite end should be a comfortable 70-75°F. This gradient is their climate control.
Bronte, my graceful Greek tortoise, will spend her mornings parked on her warm slate, soaking in the rays before ambling off to explore her cooler plants. Watching them self-regulate their body temperature is a clear sign your setup is working.
The Invisible Embrace: Managing Humidity
Humidity is the silent partner to heat, especially for tortoises like Austen and Bronte. Proper moisture in the air aids in smooth shedding and supports healthy respiration. For box turtles like my reserved Orwell, it’s even more crucial for his skin and shell hydration.
- Measure It: A simple digital hygrometer takes the guesswork out. I keep one at each end of the enclosure.
- Boost It: For a tortoise table, I mix water into the substrate and use a large, shallow water dish. Misting the enclosure in the morning mimics dew.
- Target Levels: Most tortoises thrive at 40-60% humidity, while box turtles often need 60-80%. A humid hide box filled with damp sphagnum moss offers a personal retreat.
When Orwell’s dark brown shell looks vibrant and his eyes are bright, I know the humidity is just right. Dry, flaky skin or difficulty shedding are your first clues to adjust the moisture in the air.
Keeping Watch: Health Monitoring and Common Issues
Your little turtle’s first year is a time of wonder, but it also requires a watchful eye. I learned this firsthand with my Russian tortoise, Austen; a gentle ten-year-old now, but as a hatchling, he taught me to spot the subtle shifts in health. Tiny bodies are more vulnerable, so proactive monitoring is your best tool.
Three issues pop up most often in that initial year. Respiratory infections can start if the habitat is too damp or chilly. Shell rot, a fungal or bacterial issue, often begins with a soft, discolored patch on the plastron. Parasites, both internal and external, are common stowaways from pet stores or breeders. Regular, gentle inspections are non-negotiable for catching these problems early.
- Lethargy or sleeping much more than usual.
- A clear loss of appetite for more than a day or two.
- Puffy, closed, or watery eyes.
- Mucus around the nose or mouth, or audible breathing.
- Any soft spots, pits, or unusual discoloration on the shell.
If Austen ever seems off his food, I don’t wait. Finding a vet who specializes in reptiles before you have an emergency is one of the kindest things you can do for your pet. Schedule a check-up soon after you bring your hatchling home, and then at least annually. This proactive step is pure animal advocacy-it gives them a voice.
Shedding and Shell Care Basics
Watching a young turtle shed is perfectly normal and a sign of healthy growth. Their skin will slough off in small, translucent pieces, almost like dust, and their scutes—the individual plates on the shell—will peel from the edges as new ones form beneath. This peeling is a normal part of growth, showing that new skin and shell are forming beneath. My Greek tortoise, Bronte, has a graceful, thoughtful way of rubbing against a smooth rock when her time comes.
Never, ever pull at loose skin or lifting scutes. You can cause serious harm. Instead, ensure proper hydration through soaks and a habitat humidity level suited to your species. A shallow, lukewarm soak a few times a week helps the old skin release comfortably.
Shell health is built from the inside out. A diet rich in calcium, from cuttlebone or proper supplements, and appropriate UVB light for metabolism are the bedrock of a strong shell. For my box turtle, Orwell, his reserved personality means he values a habitat with both dry basking areas and damp hideaways to regulate his shell’s condition naturally. Clean water and a habitat free of sharp edges complete the picture, preventing injuries that could lead to bigger issues.
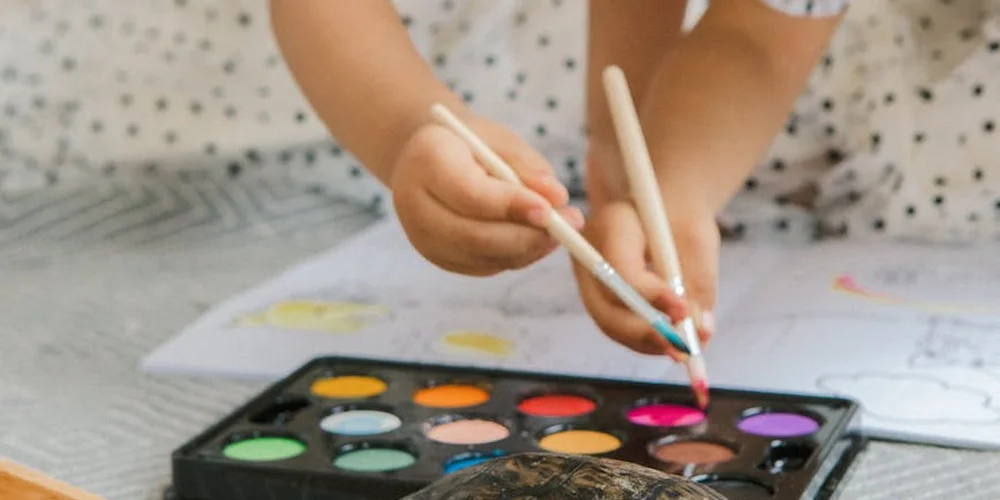
Gentle Hands: Handling and Enrichment for Young Turtiles
Think of your turtle’s first year as a delicate dance of observation and gentle encouragement. Your hands should be a source of calm, predictable interaction, not a cause for panic. I learned this with Austen; when I first brought him home, my eagerness to hold him sent him retreating into his shell for what felt like ages. Now, I approach with slow, deliberate movements, letting him see my hand before I ever lift him, and our bond is one of quiet trust.
Safe Handling: Building Bridges, Not Walls
Always support their entire body from below, like a floating island. Never pick them up by the sides of their shell or their legs. Keep handling sessions brief-just a few minutes for inspection or a quick habitat transfer-and always close to a soft surface. These are among the five critical mistakes to avoid when handling your pet turtle for the first time. Following them keeps handling safe and stress-free for you and your turtle. Young turtles can be surprisingly wiggly! Wash your hands before and after, for their safety and yours. This routine teaches them your touch isn’t a threat.
Enrichment: Crafting a World of Wonder
An enriched environment is the greatest gift for a growing mind. It prevents boredom and encourages natural, healthy behaviors.
- Varied Terrain: Smooth river stones, flat slate tiles for basking and wearing down claws, and a shallow dig box with coconut fiber or organic soil. Austen loves shuffling through his dig box before settling in for a nap.
- Foraging Fun: Scatter their leafy greens around the enclosure instead of using a bowl. Hide a piece of chopped squash under a leaf. This simple act taps into their instinct to search and explore.
- Safe Obstacles: Create gentle slopes with cork bark or arrange smooth rocks to form a little maze. Change the layout every few weeks to spark fresh curiosity.
Socialization: Understanding Their Solitary Soul
It’s vital to remember that turtles are not social creatures like dogs or cats. “Socialization” for a turtle is less about friendship and more about becoming calmly accustomed to your non-threatening presence. Building trust with a new pet turtle comes from gentle, patient handling and consistent routines. With time, you’ll notice your turtle becoming more secure around you. Your goal is a turtle that feels secure, not one that seeks cuddles.
Personality plays a huge role here. My Bronte, the Greek tortoise, is graceful and thoughtful; she observes me calmly from a distance. Orwell, the box turtle, is reserved but intelligent-he’ll watch my every move before deciding to emerge. Spend time near their habitat, reading or speaking softly, so they learn you are a peaceful part of their landscape. Never house two young turtles together; competition for food, basking spots, and territory can lead to stress and injury. Their world is one you curate, and their trust is earned through consistent, quiet respect.
Species-Specific Notes: Adjusting Care for Your Turtle
Your turtle’s first year sets the stage for a long, healthy life, and that stage looks different depending on who’s in the spotlight. Think of it like setting up a home: a water-loving slider needs a very different layout than a land-roaming tortoise. During that first month, plan a complete health and habitat checkup for your new turtle. This quick review helps ensure water quality, lighting, and enclosure setup all support a long, healthy life. Getting this right is the heart of good care.
Aquatic turtles, like red-eared sliders, live mostly in water. Their entire world revolves around a clean, spacious tank with a sturdy basking dock. Tortoises, like my Russian tortoise Austen, never swim and demand a dry landscape with room to roam. Mixing up these basic needs is the fastest way to stress your little friend. Understanding basking explains why they spend so much time out of water. It helps regulate temperature and absorb UVB for shell and bone health.
I learned this firsthand with Austen. As a hatchling, he needed a humid hide to prevent shell pyramiding, something an aquatic species never worries about. His gentle, steady pace reminded me that tortoise care is about crafting a secure, enriching terrain, not managing water quality.
Then there’s Orwell, my box turtle. He blurred the lines for me. Box turtles are semi-aquatic. They need a shallow water dish for soaking and a land area for digging and hiding. Orwell’s reserved intelligence showed me that some species require a carefully partitioned world, a true half-and-half habitat.
Key Differences to Build Around
Focus on these three pillars to tailor your care.
Diet: From Greens to Proteins
A hatchling’s diet shifts quickly, and the species dictates the menu.
- Tortoises (like Austen and Bronte): Almost entirely leafy greens, weeds, and flowers. Protein is minimal.
- Aquatic Turtles: Start with more protein like tiny worms or pellets, gradually adding more plant matter as they grow.
- Box Turtles (like Orwell): A true omnivore’s mix. They enjoy earthworms, berries, mushrooms, and soft leafy greens.
I always chop food to hatchling-sized bites, no matter the species, to prevent choking.
Habitat: Water World vs. Dry Land
This is where setups diverge completely.
- Aquatic Tanks: Water depth should allow swimming but with easy access to a dry, warm basking spot. Filtration is non-negotiable.
- Tortoise Enclosures: A large, secure pen with substrate for digging, hiding spots, and no water features beyond a shallow drinking dish.
- Semi-Aquatic Setups: A land area with moist soil and a separate, easy-exit water zone. The border between them must be clear and safe.
Your turtle’s shell health directly reflects the quality and suitability of this home environment. Are you noticing early signs of an unhealthy shell? Recognizing these signs early helps you act fast to improve conditions.
Environment: Heat, Light, and Humidity
- Basking Heat: All young turtles need it, but tortoises often require a hotter basking zone than aquatic species.
- UVB Light: Absolutely critical for every species to process calcium and avoid metabolic bone disease.
- Humidity: This is the silent variable. Tropical species need high humidity; desert tortoises need low. Austen needed a humid microclimate in his hide, while Orwell’s land area stays moderately damp.
Investing in reliable thermometers and hygrometers saves you from costly vet visits later. Watching your turtle thrive in a space built just for them is the best reward.
FAQs
How can I reduce stress for my new hatchling turtle?
Ensure the habitat has multiple hides and a consistent light-dark cycle to mimic natural rhythms. Minimize loud noises and sudden movements near the enclosure to help your turtle feel secure.
What water parameters should I monitor for an aquatic turtle hatchling?
Keep water temperature stable between 75-80°F and use a test kit to check ammonia and nitrite levels weekly. Install a reliable filter and perform partial water changes to maintain cleanliness and prevent health issues.
How do I know when to increase the size of my turtle’s food portions?
Observe if your turtle consistently finishes meals quickly and shows steady growth in shell and body size. Consult species-specific guidelines and adjust portions gradually to support development without overfeeding. Be mindful of common turtle feeding mistakes to avoid them, such as overfeeding, offering too little variety, or irregular feeding schedules.
Stepping Forward with Your Growing Turtle
Your turtle’s first year hinges on a clean habitat and a diet rich in calcium and variety to fuel healthy development. Watching my own, like Orwell the reserved box turtle, taught me that subtle changes in appetite or activity are your best clues to their well-being.
Commit to this lifelong partnership by seeking out reputable care guides and connecting with fellow enthusiasts. Every turtle, from the steady Austen to the thoughtful Bronte, deserves a keeper who grows in knowledge as their shell grows in size.
Further Reading & Sources
- Aquatic Turtle Care Sheet | PetMD
- Turtle Care Guide | Long Island Birds & Exotic Veterinary Clinicic Vet Clinic
- The Dos and Don’ts of Turtle Care – PetHelpful
- How to Take Care of a Turtle (Including Red-Eared Sliders and Other Aquatic Turtles) – Petful
Matthew is a dedicated turtle enthusiast and conservationist with over 15 years of experience in reptile care. Known affectionately as "The Leatherback" among his peers, he combines his passion for turtles with a commitment to educating pet owners on responsible turtle care and environmental stewardship.
Preventative Care