How to Build a Turtle Pond and Basking Area
Building a turtle habitat can feel overwhelming, but with a clear plan, you can create a safe and enriching home your shelled friend will thrive in for years.
I’ve built several ponds for my own turtles, and the process is deeply rewarding. Watching them swim and bask in a space you crafted is a special kind of joy.
This guide will walk you through the entire process, from planning your design and gathering materials to installing the pond, creating the perfect basking area, and adding the finishing touches for a healthy ecosystem.
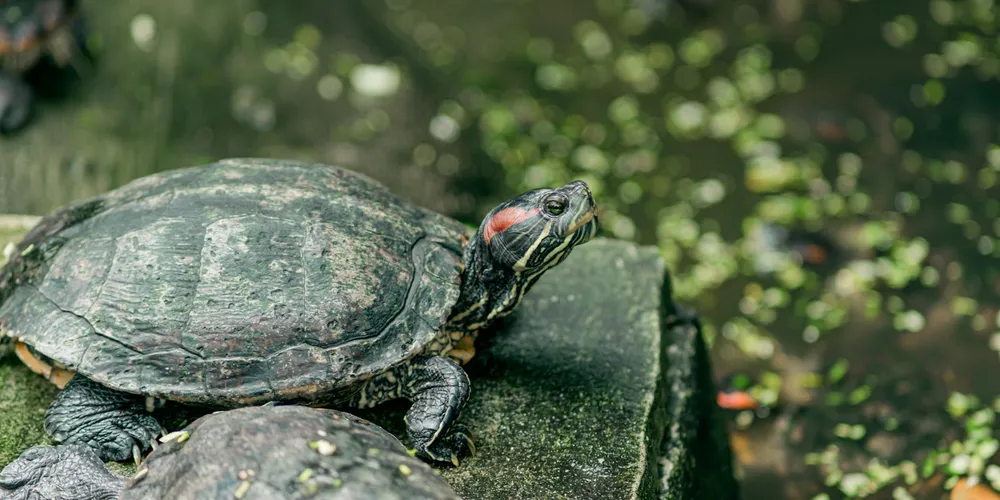
Understanding Basking for Turtle Health and Happiness
Basking is when your turtle hauls itself completely out of the water to rest under a heat source. It’s a non-negotiable part of their daily routine, crucial for both their physical health and mental well-being. They do this to regulate their internal body temperature, as they are ectothermic and rely on external heat, and to dry their shells completely, which helps prevent fungal and bacterial infections. The shell is a defining part of turtle anatomy, a living structure formed by fused bones and keratin-covered scutes. Understanding shell biology helps explain why basking supports moisture balance and shell health.
Watching my Russian tortoise, Austen, bask is a lesson in pure contentment. He finds his favorite sun-drenched rock and stretches his legs out, soaking up every ray. My Greek tortoise, Bronte, is more deliberate, often turning slowly to ensure her entire shell gets warmed. These quiet moments are when you truly see their unique personalities shine through.
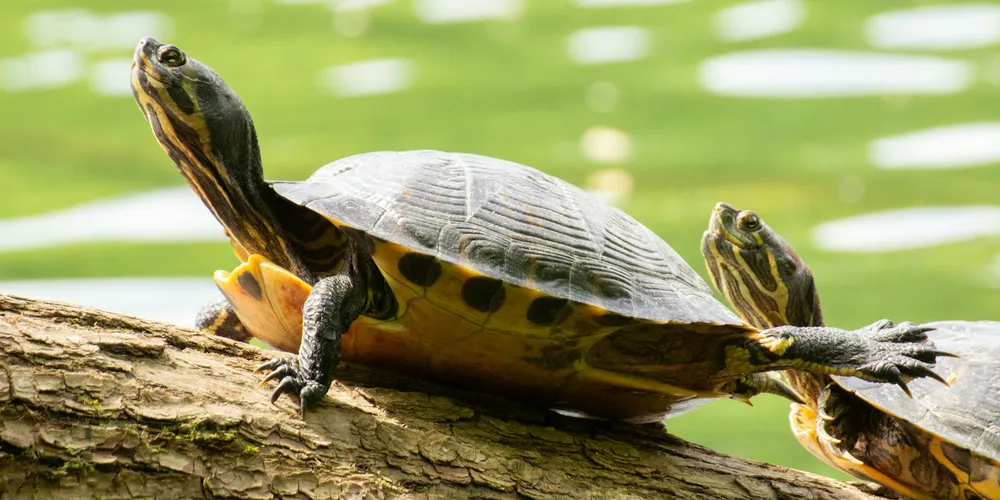
The core benefits of a proper basking area are straightforward and vital:
- UVB Absorption: Essential for metabolizing calcium and preventing metabolic bone disease, which leads to soft, deformed shells.
- Drying Off: A completely dry shell is a healthy shell, free from the rot that can develop in constantly damp skin and scutes.
- Behavior Observation: It’s your prime window into their health; a turtle that stops basking is often a turtle in trouble.
Planning Your Turtle Pond: Site Selection and Design
Choosing the right spot for your pond is the most important decision you will make. A well-planned location prevents countless problems down the road and creates a sustainable habitat for your turtles. You need a spot that receives several hours of direct sunlight for basking but also has access to shade to prevent the water from overheating and to offer your turtle a retreat. Make sure to research how to care for land and aquatic turtles to provide the best environment for them.
Consider the safety from predators like raccoons and birds. A location too close to fences or overhanging trees can provide easy access for these animals. You also need to think about water runoff; a low spot in your yard can flood your pond with contaminated rainwater from the lawn.
For the design, the pond must accommodate both swimming and basking. A good rule is to make the pond at least three to four times the length of your turtle’s shell in both width and length. Depth should vary, with a shallow end for easy entry and a deeper section for full immersion. But size isn’t arbitrary—it’s tied to your turtle’s species, age, and activity level. So ask yourself: does your turtle actually need this much enclosure, or could a smaller, well-planned setup meet its needs?
Your basic material list will include:
- A heavy-duty pond liner (EPDM rubber is a great, durable choice)
- Soft sand or smooth, large river rocks for the substrate
- A shovel for excavation
- Stones and driftwood to create the basking area and secure the liner edges
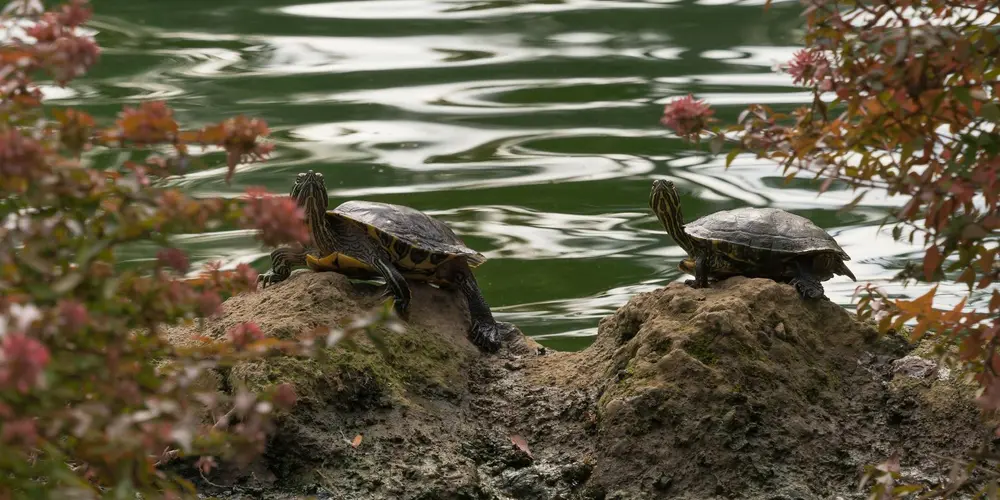
Assessing Sun Exposure and Shade Needs
Your turtle needs a Goldilocks zone of sunlight—not too much, not too little. Aim for a location that gets a solid 4-6 hours of direct sun, preferably in the morning and early afternoon. This provides the warmth and UVB needed without the scorching intensity of the late-day sun.
Shade is just as critical. You can create natural shade with aquatic plants like water lilies, which float on the surface, or by planting shrubs near the pond’s edge. For a quicker solution, a small, strategically placed wooden board or a section of a terracotta pot can offer immediate relief from the heat.
Sketching Your Pond Layout and Dimensions
Before you dig a single scoop of dirt, grab a pencil and paper. A simple sketch saves you from costly mistakes and helps you visualize the final product. Draw the basic shape of your pond-organic, kidney-bean shapes often look more natural than perfect circles or squares.
Clearly mark these zones on your plan:
- The Basking Platform: This should be a large, flat, stable area that is completely out of the water.
- The Gradual Slope: A gently sloping entrance from the basking area into the water allows for easy access.
- The Deep Zone: An area deep enough for your turtle to swim and submerge fully.
For dimensions, a small pond for one or two turtles should be at least 4 feet by 6 feet. Choosing the right tank size and shape is key to giving your aquatic turtle the space to thrive. The tank’s layout should support both swimming space and basking access while meeting water volume needs. The water volume is key; plan for a minimum of 10 gallons of water per inch of turtle shell length to ensure they have enough space to thrive.
Step-by-Step Guide to Building the Turtle Pond
Constructing a pond is a rewarding project that transforms your yard into a turtle paradise. My own tortoises, Austen and Bronte, showed immediate curiosity when I built their first enclosure, and watching them explore solidified the importance of getting every detail right.
Digging and Liner Installation
- Mark the pond’s shape with spray paint or a garden hose, ensuring it’s at least 4 feet by 3 feet for a small turtle.
- Begin digging, creating a central deep zone (about 2 feet) and gentle, sloping sides. These shallow slopes are vital, as they allow your turtle to enter and exit the water easily without exhausting themselves.
- Remove all rocks, roots, and sharp debris from the excavated hole. I learned this the hard way with a small puncture in my first liner!
- Lay a protective underlayment, like old carpet or commercial pond padding, across the entire hole.
- Carefully center your pond liner, allowing plenty of excess to overlap the edges. Smooth it into place, pressing out wrinkles and ensuring it conforms to the slopes.
- Secure the liner edges with heavy, smooth stones, avoiding any with sharp edges that could tear the material.
Adding Filtration and Aeration Systems
Clean, oxygen-rich water is non-negotiable for your turtle’s health. A powerful filter is the most critical purchase you will make, as turtles produce far more waste than fish.
- Filtration: Choose a canister filter rated for at least twice the volume of your pond. For a 100-gallon pond, use a filter made for 200+ gallons.
- Aeration: Add a simple aquarium air pump with an air stone. The bubbles oxygenate the water and create surface agitation, which helps deter algae growth and keeps the water fresher for longer.
After installing my filter, the water clarity for Orwell’s habitat improved dramatically, and he became much more active.
Finally, add a 2-3 inch layer of large, smooth river rocks as a substrate. Fill the pond slowly with water, using a dechlorinator to neutralize harmful chemicals from tap water, making it instantly safe for your shelled friend. Before introducing your turtle, double-check that all liner edges are secure, the water temperature is appropriate, and there are no sharp hazards.
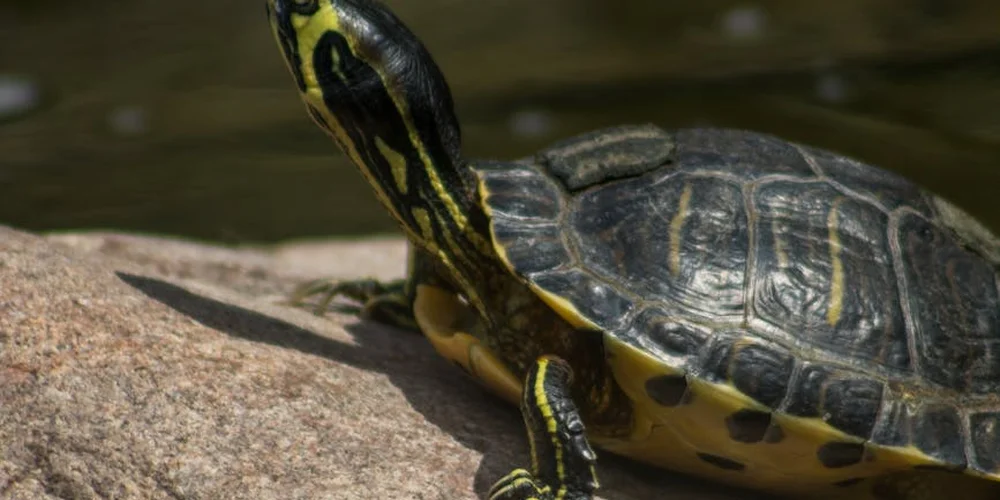
Creating a Safe and Inviting Basking Area
The basking area is your turtle’s sun-soaked lounge, essential for their digestion and shell health. I’ve found that a well-designed basking spot encourages natural behaviors, like the graceful way Bronte stretches her legs to absorb every ray of warmth. To create the perfect basking area for your aquatic turtle, set up a warm, dry platform with a gentle ramp and a reliable UVB light. This makes it easy for them to bask daily and maintain shell health.
DIY Basking Platform Designs and Materials
You can create a perfect platform with simple, non-toxic materials.
- Slate Tile: A flat piece of slate resting on a stack of bricks or stones creates a stable, easy-to-clean surface that heats up beautifully.
- Floating Dock: Commercial docks are convenient, but ensure they are sturdy enough to support your turtle’s full weight without tipping.
- Custom Wood Structure: Build a simple frame from untreated cedar or cypress wood and attach a ramp. Always seal the wood with a turtle-safe pond sealant.
Place the platform in a spot that receives several hours of direct sunlight but is also partially shielded by plants to provide a quick escape from heat or perceived threats.
Integrating Rocks and Ramps for Easy Access
Arrange a series of large, flat rocks to form a gradual staircase from the pond floor to the basking platform. Each rock should be firmly set into the substrate or pond bottom to prevent shifting when your turtle climbs. The ramp should have a rough texture for good grip. Always test the entire structure by applying gentle, consistent pressure to mimic your turtle’s weight, ensuring nothing wobbles or collapses. This simple check gives you peace of mind that your pet can climb safely and securely. Proper care and precautions are crucial for any pet turtle.
Maintaining Water Quality and Ecosystem Balance
Keeping your pond’s water clean is the single most important thing you can do for your turtle’s long-term health. I test the water in my own turtles’ pond weekly, and this simple habit has prevented countless potential health issues.
Routine Water Quality Checks
Think of these checks as a quick health report for your pond’s environment.
- pH Levels: Aim for a neutral pH between 6.8 and 7.5. You can find simple test strips at any pet or pond supply store.
- Ammonia and Nitrites: These should always read zero. Any presence indicates the biological filter isn’t fully established or is overwhelmed.
- Water Clarity: The water should be clear enough to see your turtles at the bottom. A slight green tint from microalgae is normal, but murky water signals a problem.
Selecting Aquatic and Shade Plants
Plants are not just decoration; they are your pond’s natural filtration team. Choosing the right plants creates a living system that works for you, pulling excess nutrients from the water that would otherwise feed algae.
Here are some turtle-safe options that have thrived in my pond:
- Anacharis and Hornwort (floating oxygenators)
- Water Hyacinth and Water Lettuce (surface cover)
- Amazon Sword (a sturdy, rooted plant)
To prevent your turtles from treating them like salad, plant rooted varieties in heavy, smooth river rocks or use plant baskets they can’t easily tip over.
Managing Algae and Debris
A little algae is healthy, but too much can choke out other plants and deplete oxygen.
- Natural Clean-up Crew: I introduced a few Japanese Trapdoor Snails. They are peaceful and do a fantastic job grazing on soft algae without bothering my turtles.
- Manual Removal: Use a pond net to skim off floating algae and leaves every few days. It’s a peaceful, five-minute task.
- Cleaning Schedule: Perform partial water changes of 15-25% every two weeks. This refreshes the water without stripping away the beneficial bacteria your filter has cultivated.
For seasonal shifts, reduce feeding in cooler autumn weather as turtle metabolism slows, and ensure the filter is running optimally during the hot summer months when algae growth peaks.
Protecting Your Turtle Pond from Predators and Hazards
Creating a safe haven means thinking like a protector. Raccoons, herons, and even curious neighborhood cats can see your pond as an easy meal source. After a close call with a nocturnal visitor early on, I learned that a little upfront protection brings immense peace of mind.
Installing Safety Barriers and Nets
The goal is to deter predators without making your turtles feel like they’re in a cage.
- Use PVC pipe frames to support a lightweight plastic mesh netting over the pond. This keeps birds out but lets sunlight through.
- For the pond’s perimeter, a smooth, solid fence that rises at least 18 inches out of the ground can block the reach of raccoons.
- Always ensure any material used is rigid and cannot sag into the water, creating a tangling hazard.
A well-placed barrier is invisible to your turtles but a significant obstacle for any would-be predator.
Seasonal Maintenance for Year-Round Safety
Each season brings its own set of challenges for an outdoor habitat.
- Winter Preparation: If your turtles hibernate outdoors, stop feeding them well before the first frost to allow their systems to clear. Prevent the pond surface from freezing completely with a floating pond de-icer, which maintains a crucial gas exchange hole.
- Summer Heat Management: Ensure shaded areas are plentiful. Evaporation happens quickly, so top off the pond with dechlorinated water more frequently to maintain depth and stable temperature.
- Before each major season change, check for erosion around the pond edges and inspect plants for signs of disease or die-off.
FAQs
Where can I find plans for building a pond turtle basking platform?
You can often find free or low-cost plans on reptile care websites, pet turtle forums, and DIY project platforms. These plans typically include material lists and step-by-step instructions to help you construct a safe and functional platform.
Is it better to buy a pond turtle basking platform or build one myself?
Building one yourself allows for customization to fit your pond’s specific dimensions and your turtle’s needs, often at a lower cost. Purchasing a pre-made platform can save time and ensure professional design, but always check for stability and non-toxic materials.
What should I look for in a pond turtle basking platform and shelter combo?
Look for a combo that provides a dry, stable basking surface with easy access ramps and an enclosed shelter area for hiding and protection. Ensure it’s made from durable, non-toxic materials that can withstand outdoor elements and support your turtle’s weight safely. For more tips on creating comfortable spaces for your turtle, check out our guide on how to create basking and hiding areas.
Are there reliable sources to purchase a pond turtle basking platform?
Yes, you can find them at specialty pet stores, online retailers like Amazon or Chewy, and websites dedicated to reptile supplies. Always read reviews and product descriptions to verify size, material safety, and suitability for outdoor pond use.
How do I integrate a basking platform with a shelter in my turtle pond?
Position the combo unit so the basking area receives ample sunlight while the shelter offers shade and a secure retreat, connected by a gentle ramp for easy movement. Anchor it firmly to prevent tipping and ensure both sections are easily accessible from the water.
Your Turtle’s Thriving Habitat Awaits
Creating a successful turtle pond hinges on providing a spacious, clean aquatic area paired with a dry, warm basking spot that mimics their natural environment. From building Orwell’s box turtle enclosure, I learned that robust filtration and secure edges prevent escapes and maintain water quality for years.
Caring for a pet turtle is a rewarding, lifelong journey that requires your dedication to their evolving needs and well-being. I encourage you to keep exploring turtle care, as my ongoing learning with Austen and Bronte continually deepens our bond and ensures their happiness.
Further Reading & Sources
- r/turtle on Reddit: Suggestions for turtle basking spots in pond?
- Creating a Basking Area for Your Red-Eared Slider – ReptiFiles
- Turtle Dock® and Turtle Pond Dock® | Zoo Med Laboratories, Inc.
- Turtle Basking Logs, Platforms, and Rocks – Upper Thames River Conservation Authority
Matthew is a dedicated turtle enthusiast and conservationist with over 15 years of experience in reptile care. Known affectionately as "The Leatherback" among his peers, he combines his passion for turtles with a commitment to educating pet owners on responsible turtle care and environmental stewardship.
Aquatic Turtles