Upgrading Your Turtle’s Tank: A Financial and Space-Planning Guide
Published on: February 22, 2026 | Last Updated: February 22, 2026
Written By: Matthew The
Worried about the costs and space needed to upgrade your turtle’s tank without compromising their comfort? I felt the same when expanding habitats for my tortoises Austen and Bronte, knowing that a proper setup is vital for their health and happiness.
This article walks you through budget-friendly tips, space-saving layouts, essential equipment costs, and step-by-step planning to ease your mind and benefit your shelled friend.
Assessing Your Turtle Tank Upgrade Needs
Start by observing your turtle’s current behavior and space. Watch for signs like constant pacing, hiding, or trying to escape-these often mean the enclosure feels cramped or stressful. I noticed my Russian tortoise, Austen, became more active and curious after I expanded his area, which taught me that even small upgrades can boost their well-being.
Measure your turtle’s full-grown size and compare it to the tank dimensions. As a rule, the enclosure should be at least five times the length of your turtle’s shell to allow proper movement and exploration. When Bronte, my Greek tortoise, outgrew her first home, I used a tape measure to plan for extra roaming room, preventing future health issues. It’s always important to ensure your turtle’s habitat is appropriately sized for its species and growth.
- Check water quality and filtration if aquatic-murky water or frequent cleanings signal an undersized system.
- Evaluate basking and hiding spots; inadequate areas can lead to stress or shell problems.
- Note any wear on tank equipment, like cracked heaters or faded lights, which might need replacement.
Consider your turtle’s species-specific traits, such as swimming habits or land preferences. Researching their natural habitat helps you mimic conditions that support longevity and happiness. For Orwell, my box turtle, adding more leaf litter and shallow water dishes made his space feel like the wooded areas he’d thrive in outdoors.
Creating a Realistic Budget for Your Turtle Enclosure

Break down costs into essentials like tanks, filters, and heating, then add extras for decorations or upgrades. I always set aside 20% extra for unexpected expenses, like a sudden filter failure, to avoid financial stress later. When budgeting for Austen’s upgrade, I prioritized a sturdy basking platform over fancy ornaments, ensuring his safety came first.
Research prices online and at local stores to compare options without overspending. Look for durable, reusable items that save money long-term, such as energy-efficient LED lights or modular tank parts. For Bronte’s enclosure, I chose a second-hand tank in good condition, which cut costs by half and still provided a spacious home.
- List must-haves: tank, filter, heater, UVB light, and substrate-aim for quality to reduce replacements.
- Estimate ongoing costs: electricity for equipment, water treatments, and monthly food supplies.
- Factor in DIY projects, like building a custom hide, to personalize the space affordably.
Track your spending with a simple spreadsheet or app to stay on budget. Remember, investing in your turtle’s environment is a commitment to their health, not just an expense. With Orwell, I spread purchases over a few months, making each upgrade manageable and rewarding for both of us.
Planning Your Tank’s Space and Footprint
When I first planned a larger home for Austen, my Russian Tortoise, I learned that space isn’t just about size-it’s about creating a comfortable environment that mimics their natural habits. Start by measuring the area where the tank will sit, ensuring it’s away from direct sunlight and drafts to prevent stress and temperature swings. You want a spot that’s easy for you to access for cleaning and feeding, but also safe from household hazards like curious pets or high-traffic zones.
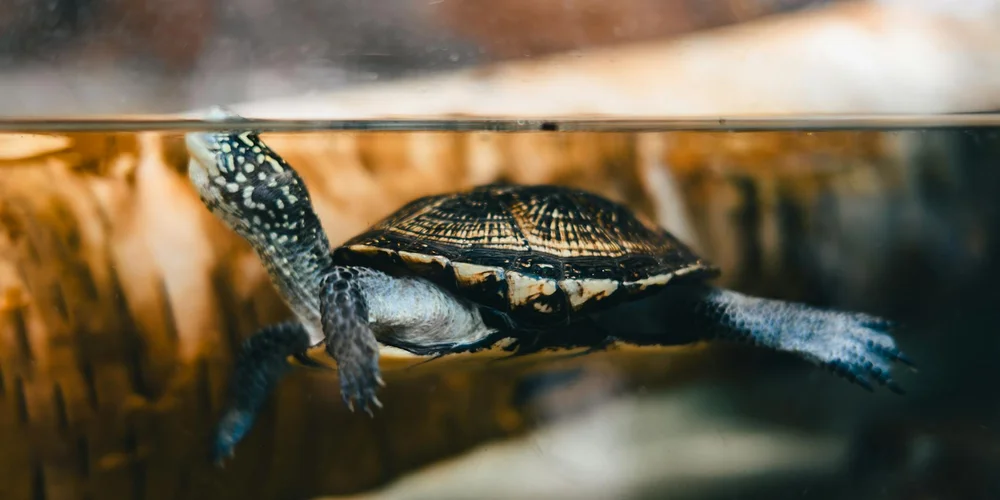
Consider the adult size of your turtle; for instance, Bronte, my Greek Tortoise, needed a tank that allowed her to roam freely without feeling cramped. A good rule is to provide at least 10 gallons of tank space per inch of shell length, but always aim bigger if you can. I’ve found that investing in a tank with a larger footprint, rather than just height, gives them more room to explore and exercise, which is vital for their health. To choose the perfect tank size and shape for your aquatic turtle, start with the turtle’s adult length and swimming needs and pick a footprint that allows a full, unrestricted swim. A long, low-profile tank often provides more usable swimming space and easier maintenance than a tall, narrow one.
- Measure your available floor space and choose a tank that fits without overcrowding the room.
- Account for future growth-turtles like Orwell, my Box Turtle, can live for decades and outgrow small setups quickly.
- Ensure the tank has a secure lid to prevent escapes, as I learned the hard way when Austen once nudged his way out overnight.
Place the tank on a sturdy stand or surface that can handle the weight when filled with water and substrate. This upfront planning saves you money and stress down the road, making upgrades smoother and more cost-effective. From my experience, a well-planned footprint not only keeps your turtle happy but also makes daily care routines much simpler for you.
Selecting Equipment for Your Upgraded Habitat
Essential Lighting and Heating Setup
Lighting and heating are non-negotiable for a healthy turtle habitat-they rely on these elements for digestion, shell health, and overall well-being. I use a combination of UVB and basking lights for my turtles, like Bronte, who basks for hours to regulate her body temperature. UVB light helps them produce vitamin D3, which is essential for absorbing calcium and preventing shell deformities, something I’ve seen improve with consistent use. You can learn more about setting up UVB lighting for turtles sourced specifically for their needs.
Choose fixtures that cover the entire tank area, and position them so the basking spot reaches 85-90°F while the cooler end stays around 75°F. Invest in a reliable thermometer to monitor temperatures daily, as fluctuations can lead to health issues like respiratory infections. I recall when Orwell showed signs of lethargy until I adjusted his heating lamp; now, he’s more active and alert.
- Select UVB bulbs designed for reptiles and replace them every 6-12 months, as their output diminishes over time.
- Use ceramic heat emitters for nighttime warmth without light, ensuring a natural day-night cycle.
- Combine lighting with timers to automate cycles, reducing your workload and providing consistency for your turtle.
Heating pads under the tank can supplement warmth, but avoid placing them directly under water areas to prevent overheating. Proper lighting and heating mimic their wild environment, reducing stress and promoting natural behaviors. From my setup, I’ve noticed that a balanced system not only keeps turtles like Austen thriving but also cuts down on vet visits, saving you money in the long run.
Water Area vs Land Area Balance
Getting the water-to-land ratio right is key to your turtle’s happiness-it affects their ability to swim, bask, and hide based on their species. For aquatic-leaning turtles, aim for a water area that’s deep enough to swim freely, typically 1.5 times their shell length. In my tank for Orwell, a Box Turtle who prefers land, I allocated about 70% of the space to dry areas with hiding spots and substrate for burrowing.
Use a gentle slope or ramp between water and land to make transitions easy, especially for younger or less agile turtles. This balance prevents injuries and encourages natural behaviors, like basking after a swim, which I’ve seen boost Bronte’s activity levels. If your turtle spends more time in water, ensure the land area is stable and dry, with materials like reptile carpet or smooth rocks that won’t harm their shells.
- Assess your turtle’s species needs-for example, Russian Tortoises like Austen require mostly land, while others might need equal parts water and dry space.
- Incorporate floating platforms or anchored logs to create basking zones that are easily accessible from the water.
- Monitor how your turtle uses the space over time and adjust as needed; I often tweak Orwell’s setup based on his seasonal habits.
Keep the water clean with a reliable filter sized for your tank’s volume, and change it regularly to maintain water quality. A well-balanced habitat supports their physical and mental health, reducing the risk of shell rot or stress-related issues. Based on my years of care, this approach not only honors their welfare but also makes tank maintenance more manageable for you.
Executing the Tank Upgrade Process
Cycling Your New Turtle Tank
Cycling your tank builds a healthy bacterial colony that breaks down waste, much like a natural ecosystem. I always start cycling before introducing any turtle to avoid harmful ammonia spikes that can stress or sicken them. With my Russian tortoise Austen, I learned this the hard way when a rushed setup led to water issues; now, I take my time for his and Bronte’s enclosures.
Follow these steps to cycle effectively. Use a liquid test kit to monitor levels—it’s more reliable than strips. Patience here pays off in a stable, low-maintenance habitat for your turtle. Establish a regular water-quality testing maintenance schedule—test weekly and log the results to observe trends. Regular monitoring helps you catch issues before they affect your turtle.
- Fill the tank with dechlorinated water and run the filter for at least 24 hours to settle everything.
- Add an ammonia source, like a pinch of fish food or pure ammonia drops, to kickstart bacterial growth.
- Test ammonia, nitrite, and nitrate weekly; you’ll see ammonia drop as nitrites rise, then nitrates appear.
- Once ammonia and nitrite read zero with some nitrates, your tank is cycled and ready for your turtle.
This process can take 4-8 weeks, so plan upgrades well in advance. I keep a log for each of my tortoises, noting water changes and test results to spot trends early. For aquatic turtles, ensure the filter matches tank size to handle their messy eating habits.
Safety and Practical Considerations
Upgrading a tank involves more than just equipment—it’s about keeping your turtle secure and comfortable. Always handle your turtle with clean, dry hands and support their shell fully to prevent drops or stress. When I moved Orwell, my box turtle, I used a shallow container lined with a soft towel to minimize jostling. That approach is part of the essential turtle tank setup and the complete daily, weekly, monthly care guide. Following a regular care schedule—daily, weekly, and monthly—helps keep your turtle secure and thriving.
Inspect the new setup for potential hazards before use. Run your fingers along all edges and seams to check for sharp points that could injure your turtle’s skin or shell. I once found a rough spot in Bronte’s basking platform and sanded it smooth-it’s a simple step that avoids vet visits.
- Maintain stable water temperature with a reliable heater, as sudden changes can weaken your turtle’s immune system.
- Ensure basking areas are easily accessible and heated properly to support digestion and overall health.
- Plan for ongoing costs like filter replacements and water treatments to avoid budget surprises down the line.
Space planning is key; turtles need room to swim, hide, and bask without crowding. For my tortoises, I allocate extra floor space for roaming, which reduces boredom and promotes natural behaviors. Always have a backup plan, like a temporary holding tank, in case the upgrade hits a snag-it saved me when Austen’s filter failed mid-change.
Cost-Saving Alternatives and Smart Upgrades
Upgrading your turtle’s habitat doesn’t have to drain your wallet or overwhelm your space. I’ve found that with a bit of creativity and planning, you can provide a enriching environment that keeps both your turtle and your budget happy. From my years caring for Austen, Bronte, and Orwell, I’ve learned that small, thoughtful changes often make the biggest impact on their well-being.
DIY Solutions That Mimic Natural Habitats
Crafting your own tank features can save you money and add a personal touch. Building a custom basking area from slate tiles and aquarium-safe silicone cost me under $20, compared to store-bought options that start at $40 or more. For Orwell’s box turtle setup, I used smooth river rocks I collected and sterilized to create hiding spots, which he adores for his reserved nature.
- Repurpose untreated wood or stones from your garden for climbing structures-just bake or boil them first to kill any bacteria.
- Use PVC pipes or food-safe containers as affordable tunnels or shelters; Bronte loves exploring hers during her graceful wanderings.
- Create a simple water dish from a shallow ceramic bowl instead of buying expensive aquatic ledges.
Budget-Friendly Filtration and Lighting
Investing in the right equipment upfront can prevent costly vet visits later. A reliable canister filter might seem pricey initially, but it reduces water changes and keeps the tank cleaner, which I’ve seen improve Austen’s gentle demeanor. Look for energy-efficient LED lights or timers to cut down on electricity bills while ensuring consistent day-night cycles.
- Opt for a filter rated for a larger tank than yours-it handles waste better and lasts longer.
- Combine natural sunlight with UVB bulbs by placing the tank near a window (but avoid direct heat to prevent overheating).
- Clean filters monthly with tank water to maintain efficiency without replacing parts too often.
Smart Substrate and Decor Choices
Choosing substrates that are easy to clean and replace can save you time and money. I switched to large, smooth gravel for Bronte’s Greek tortoise enclosure because it’s less likely to be ingested and simplifies spot-cleaning. Avoid fine sands that can cause impaction; instead, mix in coconut coir or cypress mulch for a natural feel that holds moisture well.
- Use live plants like java fern or anubias-they oxygenate the water and reduce algae, cutting down on chemical treatments.
- Rotate decor items seasonally to keep your turtle engaged without buying new toys; Orwell’s intelligent curiosity perks up with each change.
- Seal porous rocks with aquarium-safe sealant to prevent decay and extend their lifespan in humid environments.
Remember, every upgrade should prioritize your turtle’s health and natural behaviors. By focusing on durable, multi-purpose items, you create a sustainable habitat that grows with your pet’s needs. My experience with Austen, Bronte, and Orwell has taught me that a little ingenuity goes a long way in fostering their steady, thoughtful personalities.
FAQs
How do I upgrade from a small aquarium to a larger one without stressing the turtle?
Transfer your turtle gradually by using a temporary container and matching water temperatures to reduce shock. Keep some familiar decor and hiding spots in the new tank to help them adjust smoothly, especially for hatchlings. Check out The Complete Guide to Hatchling Turtle Care for more tips on setting up a tank for young turtles.
What filtration system is best for turtle tanks?
Canister filters are ideal for turtle tanks because they handle high waste loads and provide strong mechanical and biological filtration. Select a model rated for a larger tank volume to ensure efficient cleaning and water quality. When comparing canister vs internal filters for turtle habitats, consider flow rate and maintenance needs. Canister filters offer higher capacity, while internal filters can be easier to place and service in compact setups.
What substrate is safe for aquatic turtles?
Large, smooth river rocks or bare-bottom setups are safe choices to avoid ingestion and digestive issues. Steer clear of small gravel or sharp materials that could injure your turtle or trap debris.
Do aquatic turtles require a basking area and proper lighting?
Yes, aquatic turtles need a dedicated basking spot with UVB and heat lamps to support shell health and metabolic functions. This setup mimics their natural habitat, reducing stress and preventing common health problems. To do this, create the perfect basking area for your aquatic turtle. A dry, stable platform under UVB and heat helps them dry their shells and stay warm.
How many gallons per inch of turtle length is recommended?
A standard recommendation is 10 gallons of water per inch of shell length to allow for proper swimming and growth. Always choose a larger tank if space permits to enhance your turtle’s comfort and activity levels. Equally important is maintaining healthy water quality. Regularly monitor essential water quality parameters such as ammonia, nitrite, nitrate, pH, and temperature to keep the turtle tank healthy.
Moving Forward with Your Turtle’s Habitat
Start by carefully budgeting for both upfront costs and future expenses when upgrading your turtle’s tank. Proper space planning, something I refined with Bronte’s graceful movements in mind, ensures your pet has ample room to thrive and explore.
Responsible pet ownership means committing to your turtle’s well-being for its entire life. Continuously seek out new knowledge on care, as I do by observing the distinct needs of Austen, Bronte, and Orwell in their environments.
Further Reading & Sources
- Aquatic Turtle Tank Setup 101: A Beginner’s Guide | Chewy
- r/turtle on Reddit: Turtle tank upgrade
- r/turtle on Reddit: adult RES tank setup – need suggestions for improvement?
- CHEAP – EASY – DIY Above Tank Basking Platform – ONLY $15 – Turtle Tank Upgrade – YouTube
Matthew is a dedicated turtle enthusiast and conservationist with over 15 years of experience in reptile care. Known affectionately as "The Leatherback" among his peers, he combines his passion for turtles with a commitment to educating pet owners on responsible turtle care and environmental stewardship.
Tank Size and Type