How to Create a Bioactive Enclosure for Your Box Turtle
Published on: February 4, 2026 | Last Updated: February 4, 2026
Written By: Matthew The
You might be worried that building a bioactive enclosure is too complicated or could stress out your box turtle, leaving you with more work and less joy.
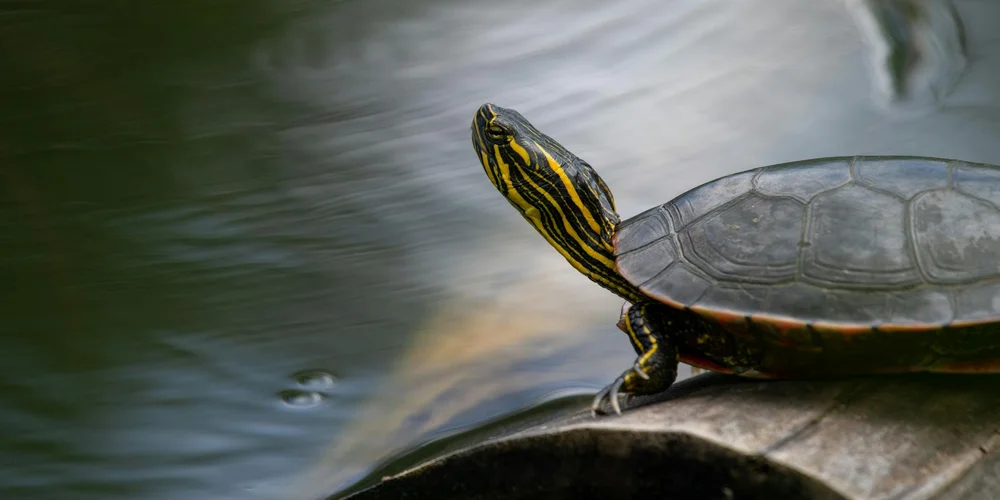
I felt that same hesitation when upgrading Orwell’s home-my reserved but clever box turtle with his dark brown shell and yellow patterns-but watching him thrive in a natural, self-cleaning habitat made every step worthwhile.
This guide walks you through: substrate basics, plant selection, cleanup crew setup, and simple maintenance routines.
Understanding the Bioactive Box Turtle Habitat
A bioactive vivarium is a living habitat where tiny organisms and plants work together to keep things clean, much like a forest floor that recycles its own waste. Think of it as a miniature ecosystem that handles cleaning duties for you, reducing your workload and mimicking nature’s balance. This setup uses microfauna-small creatures like springtails and isopods-to break down turtle waste and leftover food, turning it into nutrients for plants.
Compared to traditional terrariums that need frequent scrubbing and substrate changes, bioactive enclosures are low-maintenance and more enriching for your turtle. Traditional setups often lead to odor buildup and stress from constant disruptions, while bioactive habitats promote a stable, healthy environment with less human interference. In my experience, switching from a basic terrarium to bioactive made a huge difference for my box turtle Orwell; he stopped hiding as much and started exploring his space with curiosity.
Microfauna and plants form a self-cleaning team: the tiny critters munch on organic debris, and plants absorb the resulting nutrients, preventing mold and ammonia spikes. This cycle not only keeps the enclosure fresher but also supports your turtle’s mental and physical health by providing a dynamic, natural setting. When I introduced springtails to Orwell’s home, I noticed his digging behavior became more purposeful, and the substrate stayed odor-free for weeks.
Sharing Orwell’s transition, I recall how he initially seemed wary of the new setup but soon embraced the added textures and hiding spots. Watching him interact with the live plants and microfauna reinforced how bioactive enclosures cater to a box turtle’s instincts, making care more rewarding for both of us. Advocating for animal welfare, this approach reduces stress and mimics wild habitats, which is crucial for their long-term well-being.
Planning Your Box Turtle’s Bioactive Enclosure
Choosing the Right Enclosure Size and Type
For adult box turtles, aim for a minimum size of 4 feet by 2 feet to allow ample roaming and burrowing space. Providing enough room prevents boredom and supports natural behaviors like foraging and thermoregulation, which I’ve seen improve Orwell’s activity levels. Smaller enclosures can lead to stress and health issues, so always err on the larger side for a happier turtle. So, does your turtle actually need this much space? In most cases, the enclosure size should reflect the animal’s activity level and environmental needs, not just a blanket rule.
- Indoor enclosures offer climate control and predator protection, ideal for colder regions or urban settings.
- Outdoor setups can provide natural sunlight and seasonal variety, but require secure fencing and shade to prevent escapes or overheating.
- DIY options include repurposing storage bins or building wooden frames; 3D printing allows custom hides and ramps for a personalized touch.
- Safe materials are non-toxic and easy to clean, such as untreated wood, PVC, or food-grade plastics-avoid anything with chemicals or sharp edges.
Essential Bioactive Enclosure Components
Gathering the right supplies ensures your bioactive setup thrives from the start. A complete list includes a drainage layer, bioactive substrate, live plants, microfauna culture, heating elements, and UVB lighting, all working in harmony for a self-sustaining home. I learned this the hard way with Orwell; skipping any part led to imbalances that took time to correct.
- Drainage layer materials like clay balls or gravel should be 1-2 inches deep to prevent waterlogging and root rot.
- Bioactive substrate mix combines coconut coir, sphagnum moss, and leaf litter for moisture retention and microfauna food sources.
- Heating equipment such as ceramic heat emitters or under-tank pads maintains a gradient of 75-85°F for basking and digestion.
- UVB lighting is non-negotiable for vitamin D3 synthesis; use linear fluorescent bulbs replaced every 6-12 months to support shell health.
Building Your Bioactive Substrate Foundation
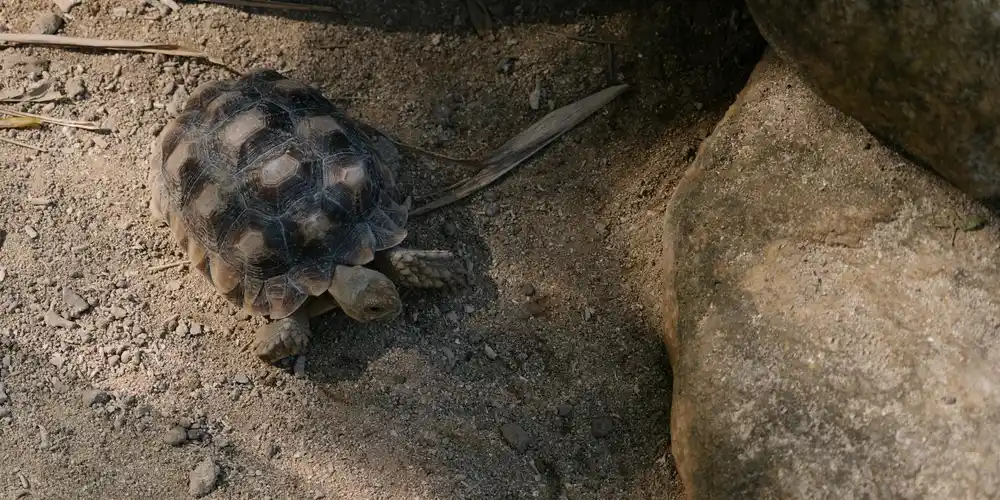
Creating the right substrate is like mixing a perfect potting soil for a garden that also serves as your turtle’s home. This foundational layer supports plant life, burrowing behavior, and the entire cleanup crew ecosystem. This substrate also supports digging and nesting behaviors in many turtle species. Proper texture and depth give turtles a safe place to tunnel and lay eggs.
Step-by-Step Substrate Layer Creation
- Start with a drainage layer of clay balls or lava rock at the bottom, about 1-2 inches deep.
- Place a permeable barrier, like a weed cloth, over the drainage layer to prevent soil from sifting down.
- Begin building your main substrate mix on top of this barrier, aiming for a depth of at least 4-6 inches.
- Gently pack the substrate down to eliminate large air pockets, but don’t compact it too tightly.
Proper Ratios for Coco Coir, Topsoil, and Additives
Getting the mix right is crucial for moisture retention and structure. A balanced substrate holds humidity for your turtle and provides a stable medium for plant roots. For the best substrate in a terrestrial turtle or tortoise enclosure, stability and moisture control are essential. These principles guide how I choose mixes for such setups. Based on my experience with Orwell’s enclosure, I’ve found this ratio works beautifully:
- 40% Organic Topsoil (ensure it has no fertilizers or pesticides)
- 40% Coco Coir (excellent for moisture and aeration)
- 20% Play Sand (provides weight and aids in digging)
- Handful of Sphagnum Moss (mixed in for extra humidity pockets)
- Crushed Oyster Shell or Calcium Sand (sprinkled in for calcium)
Importance of Leaf Litter and Natural Materials
Don’t skip the leaf litter! This natural carpet is a cafeteria and hiding place for your microfauna, and it mimics the forest floor environment box turtles adore. I always collect oak and magnolia leaves for Orwell’s home. You can also add:
- Crumbled pieces of cork bark
- Sphagnum moss patches on the surface
- Small, sterilized twigs and bark pieces
Testing Substrate Moisture and Composition
Before adding your turtle, do the squeeze test. Grab a handful of substrate and squeeze it firmly; it should hold its shape briefly before crumbling apart, indicating ideal moisture. If water runs out, it’s too wet. If it’s dusty, it’s too dry. Adjust by adding water or more dry components accordingly.
Selecting Plants and Cleanup Crew

Choosing Box Turtle-Safe Live Plants
Orwell has taught me that turtles are not gentle gardeners. You need plants that are non-toxic, resilient, and can handle some shell-shocking encounters. When planning a turtle or tortoise enclosure, choose plants that are safe for them. Beware that some common greens can be unsafe.
List of Non-Toxic, Sturdy Plant Species
- Spider Plant (Chlorophytum comosum)
- Boston Fern (Nephrolepis exaltata)
- Pothos (Epipremnum aureum) – a fast-growing favorite
- Bromeliads (Neoregelia species)
- Peperomia (Peperomia species)
Planting Techniques That Withstand Turtle Activity
Protect your plant’s roots from enthusiastic digging. I plant my ferns and pothos in small, shallow terracotta pots and then bury the pots within the substrate, leaving just the rim exposed. This gives the roots a safe zone while the plant grows out into the enclosure.
Creating Visual Barriers and Enrichment
Clumps of sturdy plants create hiding spots and break up the line of sight. This simple layout trick reduces stress by giving your turtle choices and places to feel secure, just like they would find in the wild.
Plant Care Within the Bioactive System
Your turtle will contribute to plant fertilization, but you may need to supplement. I use a diluted, organic liquid fertilizer sprayed on the leaves every few months, being careful to avoid the water dish and food areas.
Introducing Your Microfauna Team
These tiny janitors are the heart of a self-cleaning enclosure. A healthy microfauna population will break down waste, aerate the soil, and prevent mold, creating a healthier home for your turtle.
Springtails and Isopods Species Selection
Not all cleanup crews are created equal. For a box turtle enclosure, I recommend temperate white springtails (Folsomia candida) and dwarf white isopods (Trichorhina tomentosa) as they thrive in the same warm, humid conditions your turtle needs.
Proper Introduction and Establishment Methods
- Introduce your microfauna *before* adding your turtle to let them establish.
- Release them directly onto the moist leaf litter and damp areas of the substrate.
- Provide a protein source like a tiny bit of fish flake or turtle pellet to kickstart their colony.
Maintaining Healthy Cleanup Crew Populations
Your turtle will snack on these critters, which is natural and provides enrichment. To maintain the population, I add a “isopod hotel”-a piece of cork bark flat on the substrate with a piece of cuttlebone underneath-to give them a safe breeding and feeding space. Besides sourcing your fresh foods for your turtle, it’s essential to ensure they have natural live food options to keep their diet diverse and enriching.
Addressing Common Microfauna Concerns
If you see a population boom, don’t panic. It usually means there’s ample food, and the numbers will balance out as the system matures. If populations crash, check that the substrate isn’t too dry or that chemical cleaners haven’t been introduced.
Creating the Perfect Environment
Setting up temperature and humidity gradients
Box turtles thrive with a thermal gradient that lets them move between warm and cool zones. I keep Orwell’s enclosure with a basking area at 85-90°F and a cooler end around 75°F. Humidity stays between 60-80%, which I achieve with daily misting and a moisture-retaining substrate. Proper gradients allow your turtle to self-regulate its body temperature, just like in the wild. Use digital thermometers and hygrometers for accurate readings—I check them every morning to ensure consistency. Do turtles need nighttime heat management? Yes—many keepers use a gentle nighttime temperature drop to mimic natural cycles, so a nighttime management guide can help you set safe, species-appropriate ranges.
Positioning basking spots and hides
Place the basking spot directly under a heat lamp, but not too close to prevent burns. I positioned Orwell’s favorite hide-a half-log-in the cooler area, with another near the warm side for options. Multiple hides in different temperature zones reduce stress and encourage natural exploration. Ensure basking surfaces are flat and stable, like a slate tile, which holds heat well and is easy for your turtle to climb onto.
Monitoring and maintaining ideal conditions
Daily checks on temperature and humidity prevent sudden shifts. I use automatic timers for lights to mimic natural day-night cycles, and I adjust misting based on the season. Consistent conditions support digestion, hydration, and overall health in box turtles. This ties into diagnosing your turtle’s habitat with a checklist for perfect lighting, heat, and water. Regular checks ensure all three elements stay within safe, species-appropriate ranges. If humidity drops, add a shallow water dish or more live plants to boost moisture levels naturally.
Naturalistic décor placement strategies
Arrange décor to create visual barriers and enrichment opportunities. I used smooth rocks, untreated wood, and edible plants like spiderwort in Orwell’s space. Strategic placement mimics a turtle’s natural habitat, promoting mental stimulation and physical activity. This approach helps create a naturalistic turtle habitat with proper decor. Prioritize materials and forms that echo wild environments while remaining safe and easy to clean. Avoid overcrowding—leave open paths for movement, and anchor items securely to prevent tipping.
- Use vertical elements like branches for climbing
- Incorporate leaf litter for hiding and foraging
- Rotate décor occasionally to keep the environment engaging
Maintaining Your Bioactive Box Turtle Enclosure
Daily, weekly, and monthly maintenance tasks
Stick to a simple routine to keep the ecosystem balanced. Each day, I remove visible waste and check food and water levels. Weekly, I inspect plants for damage and ensure microfauna are active. Monthly, I do a deeper substrate check and clean the water dish thoroughly. Regular upkeep prevents issues before they become problems, saving you time and stress.
- Daily: Spot clean, refresh water, observe turtle behavior
- Weekly: Trim plants, check humidity and temperature devices
- Monthly: Assess substrate condition and microfauna health
Spot cleaning and waste management
Remove feces and uneaten food promptly to avoid ammonia buildup. In Orwell’s enclosure, I use a small scoop for quick clean-ups, which the clean-up crew-like isopods-helps break down further. Efficient waste management keeps the enclosure fresh and supports a healthy microfauna population. If odors arise, it might signal overfeeding or insufficient clean-up crew; adjust as needed.
Plant and microfauna population checks
Monitor plants for yellowing or pests, and replace any that aren’t thriving. I check microfauna, such as springtails, by gently lifting leaf litter-they should be visible and active. Vibrant plants and microfauna indicate a thriving bioactive system that reduces your cleaning workload. If populations dwindle, introduce more isopods or adjust substrate moisture to encourage breeding.
Substrate refreshment schedule
In a bioactive setup, substrate lasts longer, but partial refreshes are needed. I replace the top layer every six months and do a full change only if compaction or odor occurs. Refreshing substrate maintains nutrient levels and prevents mold, supporting plant and turtle health. Mix in coconut coir and organic soil to keep it loose and aerated for burrowing.
Troubleshooting Common Bioactive Issues
-
Addressing mold, pests, or odor problems starts with identifying the root cause, like excess moisture or poor ventilation. In my setup for Orwell, I once battled a fuzzy white mold by simply increasing air flow and reducing watering frequency. Mold often signals too much humidity, so check your substrate isn’t soggy. For pests like mites or fungus gnats, introduce predatory species like hypoaspis mites, which I’ve found effective. Odors usually mean waste buildup; spot-clean daily and ensure your cleanup crew, such as isopods, is thriving. If problems persist, replace the top layer of substrate and monitor closely.
-
Balancing humidity and temperature fluctuations requires consistent monitoring with digital hygrometers and thermostats. I keep Orwell’s enclosure between 70-80% humidity and 75-85°F by misting lightly in the morning and using a heat lamp on a timer. Sudden drops can stress your turtle and plants, so avoid placing the enclosure near drafts or direct sunlight. If humidity spikes, add more ventilation or a small fan; if it’s too low, incorporate a humid hide or sphagnum moss. In a terrestrial turtle habitat, maintaining proper humidity levels is essential for hydration and shell health. Regularly checking humidity helps keep the environment within the ideal range. Remember, stable conditions mimic their natural habitat and prevent health issues.
-
Reviving struggling plants or cleanup crews involves quick adjustments to light, water, and food sources. When my pothos plants in Bronte’s enclosure wilted, I moved them to a brighter spot and trimmed dead leaves, which spurred new growth. For plants, ensure they get adequate indirect light and aren’t overwatered. If cleanup crews like springtails or isopods decline, add leaf litter or vegetable scraps as food, and check that the substrate isn’t compacted. Sometimes, a small boost with calcium-rich supplements can reinvigorate them, as I’ve seen with Austen’s crew.
-
When to partially or fully restart the system depends on persistent issues like chronic mold, foul smells, or a collapsed cleanup population. After a major pest infestation in Orwell’s home, I did a partial restart by replacing half the substrate and reintroducing beneficial insects, which saved time and stress. Partial restarts work for localized problems, while full restarts are needed if the entire ecosystem fails, such as with widespread disease. Always quarantine your turtle temporarily, sanitize non-porous items, and rebuild with fresh, balanced materials to ensure their welfare.
FAQs
Can I use 3D printing for my box turtle enclosure?
Yes, 3D printing allows you to design custom hides, ramps, and feeding stations tailored to your turtle’s needs. Always use non-toxic, biodegradable filaments like PLA to ensure safety and avoid harming the bioactive environment.
What is a Voron enclosure for box turtles?
A Voron enclosure refers to a custom 3D-printed habitat built using Voron printer designs for precise, modular components that fit together seamlessly. This approach lets you create unique structures, but verify all parts are sturdy and free of sharp edges to prevent injury.
Are there GitHub repositories for box turtle enclosure designs?
Yes, GitHub hosts open-source repositories with 3D models, assembly instructions, and community tips for building box turtle enclosures. You can download and modify these designs to suit your space and incorporate bioactive elements like planted areas.
What are some creative ideas for box turtle enclosures?
Consider adding multi-level platforms with gentle slopes for climbing or themed zones that mimic natural landscapes like wetlands or meadows. Integrate edible plants and hidden shelters to encourage foraging and reduce stress through environmental enrichment.
How do I set up an outdoor bioactive enclosure for my box turtle?
Select a well-drained, sunny location with secure fencing to prevent escapes and protect from predators. Incorporate hardy native plants and a deep substrate layer to sustain the cleanup crew and handle weather variations effectively.
Your Bioactive Enclosure Journey Complete
Start with a deep substrate layer and add live plants to create a natural, self-cleaning home for your box turtle. Based on my years with Orwell, my intelligent box turtle, this approach reduces your workload and supports their instinctual digging and foraging habits.
Commit to regular observation and adjustments to ensure your turtle thrives in this enriched environment. Animal welfare is at the heart of pet care, so keep exploring resources and connecting with fellow turtle enthusiasts to grow your skills. Enrichment activities help keep pet turtles active and healthy. Try safe puzzle feeders, varied textures, and supervised exploration to stimulate their minds and bodies.
Further Reading & Sources
- Bioactive Turtle Tank Terrarium Kits | The Bio Dude – Tagged “plant”
- How to create bio active substrate | Page 3 | Tortoise Forum
- Live Plants – Box Turtle Enclosure | Tortoise Forum
- Bioactive Turtle Tank Terrarium Kits | The Bio Dude
Matthew is a dedicated turtle enthusiast and conservationist with over 15 years of experience in reptile care. Known affectionately as "The Leatherback" among his peers, he combines his passion for turtles with a commitment to educating pet owners on responsible turtle care and environmental stewardship.
Substrate and Flooring